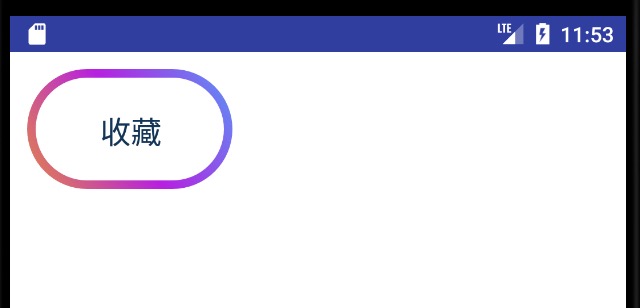
废话不多说,先上效果图: 该效果其实由三部分组成: 关于渐变,估计大家都不会陌生,以往都是使用 shape_gradient.xml 但是,这个只能支持双色渐变,超过双色就无能为力了,所以,我们要考虑使用其它方式: 创建自定义 效果: 关于圆角,我们需要使用到 由于这里的 还是刚刚的自定义 效果: 至于中间的空白部分,其实我们依葫芦画瓢,再画上一个白色的圆角 总体代码: 效果: 像文本就简单了,使用 正确做法: 至此,基本功能的制作就完成了 上面虽然已经把全部功能都讲解完了,但是,假如就直接这样放入项目中,是极其不规范的,无法动态设置文本、文本大小、颜色厚度等等 这里,我进行了简易封装,大家可以基于此进行业务修改:
渐变
gradient进行制作:<?xml version="1.0" encoding="utf-8"?> <shape xmlns:android="http://schemas.android.com/apk/res/android"> <gradient android:startColor="#B620E0" android:endColor="#E38746" /> </shape> <View android:layout_width="match_parent" android:layout_height="70dp" android:background="@drawable/shape_gradient" /> 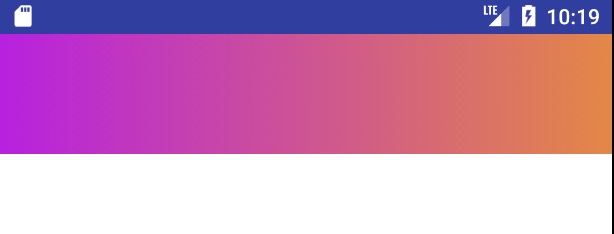
/** * Create a shader that draws a linear gradient along a line. * * @param x0 The x-coordinate for the start of the gradient line * @param y0 The y-coordinate for the start of the gradient line * @param x1 The x-coordinate for the end of the gradient line * @param y1 The y-coordinate for the end of the gradient line * @param colors The colors to be distributed along the gradient line * @param positions May be null. The relative positions [0..1] of * each corresponding color in the colors array. If this is null, * the the colors are distributed evenly along the gradient line. * @param tile The Shader tiling mode */ public LinearGradient(float x0, float y0, float x1, float y1, @NonNull @ColorInt int colors[], @Nullable float positions[], @NonNull TileMode tile) /** * x0、y0、x1、y1为决定渐变颜色方向的两个坐标点,x0、y0为起始坐标,x1、y1为终点坐标 * @param colors 所有渐变颜色的数组,即放多少个颜色进去,就有多少种渐变颜色 * @param positions 渐变颜色的比值,默认为均匀分布。 * 把总长度理解为1,假如里面的值为[0.3,0.2,0.5],那么,渐变的颜色就会以 0.3 : 0:2 :0.5 比例进行排版 * @param tile 着色器模式 */ public LinearGradient(float x0, float y0, float x1, float y1, int colors[], float positions[], TileMode tile) Viewpublic class ColorView extends View { public ColorView(Context context) { super(context); } public ColorView(Context context, @Nullable AttributeSet attrs) { super(context, attrs); } public ColorView(Context context, @Nullable AttributeSet attrs, int defStyleAttr) { super(context, attrs, defStyleAttr); } @Override protected void onDraw(Canvas canvas) { super.onDraw(canvas); //获取宽高 int width = getWidth(); int height = getHeight(); //渐变的颜色 int colorStart = Color.parseColor("#E38746"); int color1 = Color.parseColor("#B620E0"); int colorEnd = Color.parseColor("#5995F6"); //绘画渐变效果 Paint paintColor = new Paint(); LinearGradient backGradient = new LinearGradient(0, height, width, 0, new int[]{colorStart, color1, colorEnd}, null, Shader.TileMode.CLAMP); paintColor.setShader(backGradient); canvas.drawRect(0, 0, width, height, paintColor); } } <com.jm.xpproject.ColorView android:layout_width="match_parent" android:layout_height="70dp" /> 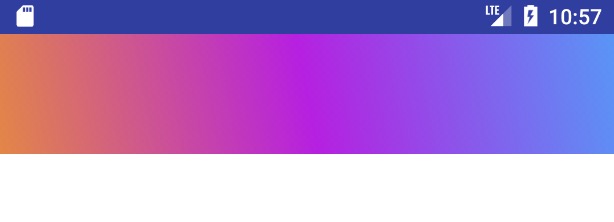
圆角
BitmapShader,使用方式: BitmapShader bitmapShaderColor = new BitmapShader(bitmapColor, Shader.TileMode.CLAMP, Shader.TileMode.CLAMP); // 初始化画笔 Paint paintFillet = new Paint(); paintFillet.setAntiAlias(true); paintFillet.setShader(bitmapShaderColor); //绘画到画布中 canvas.drawRoundRect(new RectF(0, 0, width, height), radius, radius, paintFillet); BitmapShader是对于Bitmap进行操作的,所以,对于渐变效果,我们不能直接把他绘画到原始画布上,而是生成一个Bitmap,将渐变绘画记录下来:View @Override protected void onDraw(Canvas canvas) { super.onDraw(canvas); //获取View的宽高 int width = getWidth(); int height = getHeight(); //第一步,绘画出一个渐变效果的Bitmap //创建存放渐变效果的bitmap Bitmap bitmapColor = Bitmap.createBitmap(width, height, Bitmap.Config.ARGB_8888); Canvas canvasColor = new Canvas(bitmapColor); //渐变的颜色 int colorStart = Color.parseColor("#E38746"); int color1 = Color.parseColor("#B620E0"); int colorEnd = Color.parseColor("#5995F6"); //绘画渐变效果 Paint paintColor = new Paint(); LinearGradient backGradient = new LinearGradient(0, height, width, 0, new int[]{colorStart, color1, colorEnd}, null, Shader.TileMode.CLAMP); paintColor.setShader(backGradient); canvasColor.drawRect(0, 0, width, height, paintColor); //第二步,绘画出一个圆角渐变效果 //绘画出圆角渐变效果 BitmapShader bitmapShaderColor = new BitmapShader(bitmapColor, Shader.TileMode.CLAMP, Shader.TileMode.CLAMP); // 初始化画笔 Paint paintFillet = new Paint(); paintFillet.setAntiAlias(true); paintFillet.setShader(bitmapShaderColor); //绘画到画布中 canvas.drawRoundRect(new RectF(0, 0, width, height), 100, 100, paintFillet); } 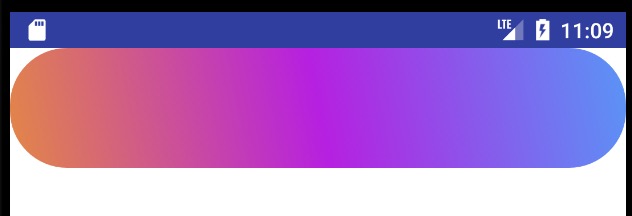
Bitmap即可: //创建存放白底的bitmap Bitmap bitmapWhite = Bitmap.createBitmap(width - colorWidth * 2, height - colorWidth * 2, Bitmap.Config.RGB_565); bitmapWhite.eraseColor(Color.parseColor("#FFFFFF")); BitmapShader bitmapShaderWhite = new BitmapShader(bitmapWhite, Shader.TileMode.CLAMP, Shader.TileMode.CLAMP); // 初始化画笔 Paint paintWhite = new Paint(); paintWhite.setAntiAlias(true); paintWhite.setShader(bitmapShaderWhite); // 将白色Bitmap绘制到画布上面 canvas.drawRoundRect(new RectF(colorWidth, colorWidth, width - colorWidth, height - colorWidth), radius, radius, paintWhite); @Override protected void onDraw(Canvas canvas) { super.onDraw(canvas); //获取View的宽高 int width = getWidth(); int height = getHeight(); //第一步,绘画出一个渐变效果的Bitmap //创建存放渐变效果的bitmap Bitmap bitmapColor = Bitmap.createBitmap(width, height, Bitmap.Config.ARGB_8888); Canvas canvasColor = new Canvas(bitmapColor); //渐变的颜色 int colorStart = Color.parseColor("#E38746"); int color1 = Color.parseColor("#B620E0"); int colorEnd = Color.parseColor("#5995F6"); //绘画渐变效果 Paint paintColor = new Paint(); LinearGradient backGradient = new LinearGradient(0, height, width, 0, new int[]{colorStart, color1, colorEnd}, null, Shader.TileMode.CLAMP); paintColor.setShader(backGradient); canvasColor.drawRect(0, 0, width, height, paintColor); //第二步,绘画出一个圆角渐变效果 //绘画出圆角渐变效果 BitmapShader bitmapShaderColor = new BitmapShader(bitmapColor, Shader.TileMode.CLAMP, Shader.TileMode.CLAMP); // 初始化画笔 Paint paintFillet = new Paint(); paintFillet.setAntiAlias(true); paintFillet.setShader(bitmapShaderColor); //绘画到画布中 canvas.drawRoundRect(new RectF(0, 0, width, height), 100, 100, paintFillet); //第三步,绘画出一个白色的bitmap覆盖上去 //创建存放白底的bitmap Bitmap bitmapWhite = Bitmap.createBitmap(width - 5 * 2, height - 5 * 2, Bitmap.Config.RGB_565); bitmapWhite.eraseColor(Color.parseColor("#FFFFFF")); BitmapShader bitmapShaderWhite = new BitmapShader(bitmapWhite, Shader.TileMode.CLAMP, Shader.TileMode.CLAMP); // 初始化画笔 Paint paintWhite = new Paint(); paintWhite.setAntiAlias(true); paintWhite.setShader(bitmapShaderWhite); // 将白色Bitmap绘制到画布上面 canvas.drawRoundRect(new RectF(5, 5, width - 5, height - 5), 100, 100, paintWhite); } 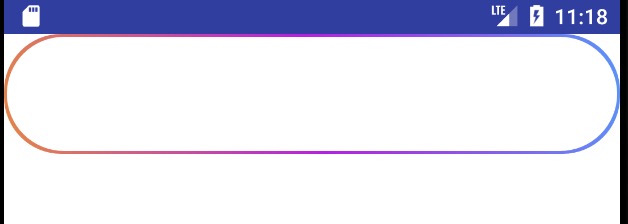
文本
drawText即可,只要注意在绘画的时候,要对文本进行居中显示,因为 Android 默认绘画文本,是从左下角进行绘画的,就像这样: Paint paintText = new Paint(); paintText.setAntiAlias(true); paintText.setColor(Color.parseColor("#000000")); paintText.setTextSize(100); canvas.drawText("", width / 2, height / 2, paintText); canvas.drawLine(width / 2, 0, width / 2, height, paintText); canvas.drawLine(0, height / 2, width, height / 2, paintText); 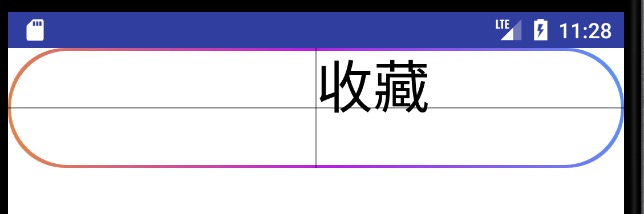
String text = ""; Rect rect = new Rect(); Paint paintText = new Paint(); paintText.setAntiAlias(true); paintText.setColor(Color.parseColor("#000000")); paintText.setTextSize(100); paintText.getTextBounds(text, 0, text.length(), rect); int widthFont = rect.width();//文本的宽度 int heightFont = rect.height();//文本的高度 canvas.drawText(text, (width - widthFont) / 2, (height+heightFont) / 2, paintText); 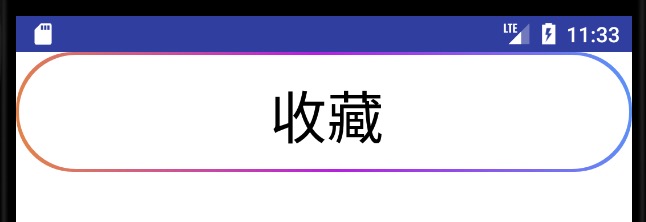
@Override protected void onDraw(Canvas canvas) { super.onDraw(canvas); //获取View的宽高 int width = getWidth(); int height = getHeight(); //第一步,绘画出一个渐变效果的Bitmap //创建存放渐变效果的bitmap Bitmap bitmapColor = Bitmap.createBitmap(width, height, Bitmap.Config.ARGB_8888); Canvas canvasColor = new Canvas(bitmapColor); //渐变的颜色 int colorStart = Color.parseColor("#E38746"); int color1 = Color.parseColor("#B620E0"); int colorEnd = Color.parseColor("#5995F6"); //绘画渐变效果 Paint paintColor = new Paint(); LinearGradient backGradient = new LinearGradient(0, height, width, 0, new int[]{colorStart, color1, colorEnd}, null, Shader.TileMode.CLAMP); paintColor.setShader(backGradient); canvasColor.drawRect(0, 0, width, height, paintColor); //第二步,绘画出一个圆角渐变效果 //绘画出圆角渐变效果 BitmapShader bitmapShaderColor = new BitmapShader(bitmapColor, Shader.TileMode.CLAMP, Shader.TileMode.CLAMP); // 初始化画笔 Paint paintFillet = new Paint(); paintFillet.setAntiAlias(true); paintFillet.setShader(bitmapShaderColor); //绘画到画布中 canvas.drawRoundRect(new RectF(0, 0, width, height), 100, 100, paintFillet); //第三步,绘画出一个白色的bitmap覆盖上去 //创建存放白底的bitmap Bitmap bitmapWhite = Bitmap.createBitmap(width - 5 * 2, height - 5 * 2, Bitmap.Config.RGB_565); bitmapWhite.eraseColor(Color.parseColor("#FFFFFF")); BitmapShader bitmapShaderWhite = new BitmapShader(bitmapWhite, Shader.TileMode.CLAMP, Shader.TileMode.CLAMP); // 初始化画笔 Paint paintWhite = new Paint(); paintWhite.setAntiAlias(true); paintWhite.setShader(bitmapShaderWhite); // 将白色Bitmap绘制到画布上面 canvas.drawRoundRect(new RectF(5, 5, width - 5, height - 5), 100, 100, paintWhite); String text = ""; Rect rect = new Rect(); Paint paintText = new Paint(); paintText.setAntiAlias(true); paintText.setColor(Color.parseColor("#000000")); paintText.setTextSize(100); paintText.getTextBounds(text, 0, text.length(), rect); int widthFont = rect.width();//文本的宽度 int heightFont = rect.height();//文本的高度 canvas.drawText(text, (width - widthFont) / 2, (height+heightFont) / 2, paintText); } 封装
attrs.xml <declare-styleable name="GradientColorButton"> <attr name="btnText" format="string" /> <attr name="btnTextSize" format="dimension" /> <attr name="btnTextColor" format="color" /> <attr name="colorWidth" format="dimension" /> <attr name="colorRadius" format="dimension" /> </declare-styleable> public class GradientColorButton extends View { /** * 文本 */ private String text = ""; /** * 文本颜色 */ private int textColor; /** * 文本大小 */ private float textSize; /** * 颜色的宽度 */ private float colorWidth; /** * 圆角度数 */ private float radius; //渐变的颜色 private int colorStart = Color.parseColor("#E38746"); private int color1 = Color.parseColor("#B620E0"); private int colorEnd = Color.parseColor("#5995F6"); //控件的宽高 private int width; private int height; /** * 渐变颜色的Bitmap */ private Bitmap bitmapColor; //画笔 private Paint paintColor; private Paint paintFillet; private Paint paintWhite; private Paint paintText; //字体的宽高 private int widthFont; private int heightFont; public GradientColorButton(Context context) { super(context); } public GradientColorButton(Context context, @Nullable AttributeSet attrs) { this(context, attrs, 0); } public GradientColorButton(Context context, @Nullable AttributeSet attrs, int defStyleAttr) { super(context, attrs, defStyleAttr); //获取参数 TypedArray a = context.obtainStyledAttributes(attrs, R.styleable.GradientColorButton, defStyleAttr, 0); text = a.getString(R.styleable.GradientColorButton_btnText); textColor = a.getColor(R.styleable.GradientColorButton_btnTextColor, Color.BLACK); textSize = a.getDimension(R.styleable.GradientColorButton_btnTextSize, 16); colorWidth = a.getDimension(R.styleable.GradientColorButton_colorWidth, 5); radius = a.getDimension(R.styleable.GradientColorButton_colorRadius, 100); } @Override protected void onLayout(boolean changed, int left, int top, int right, int bottom) { super.onLayout(changed, left, top, right, bottom); //获取View的宽高 width = getWidth(); height = getHeight(); //制作一个渐变效果的Bitmap createGradientBitmap(); //初始化圆角配置 initFilletConfiguration(); //初始化白色Bitmap配置 initWhiteBitmapConfiguration(); //初始化文本配置 initTextConfiguration(); } /** * 创建渐变颜色的Bitmap */ private void createGradientBitmap() { //创建存放渐变效果的bitmap bitmapColor = Bitmap.createBitmap(width, height, Bitmap.Config.ARGB_8888); Canvas canvasColor = new Canvas(bitmapColor); LinearGradient backGradient = new LinearGradient(0, height, width, 0, new int[]{colorStart, color1, colorEnd}, null, Shader.TileMode.CLAMP); //绘画渐变效果 paintColor = new Paint(); paintColor.setShader(backGradient); canvasColor.drawRect(0, 0, width, height, paintColor); } /** * 初始化圆角配置 */ private void initFilletConfiguration() { //绘画出圆角渐变效果 BitmapShader bitmapShaderColor = new BitmapShader(bitmapColor, Shader.TileMode.CLAMP, Shader.TileMode.CLAMP); // 初始化画笔 paintFillet = new Paint(); paintFillet.setAntiAlias(true); paintFillet.setShader(bitmapShaderColor); } /** * 初始化白色Bitmap配置 */ private void initWhiteBitmapConfiguration() { //创建存放白底的bitmap Bitmap bitmapWhite = Bitmap.createBitmap((int) (width - colorWidth * 2), (int) (height - colorWidth * 2), Bitmap.Config.RGB_565); bitmapWhite.eraseColor(Color.parseColor("#FFFFFF")); BitmapShader bitmapShaderWhite = new BitmapShader(bitmapWhite, Shader.TileMode.CLAMP, Shader.TileMode.CLAMP); // 初始化画笔 paintWhite = new Paint(); paintWhite.setAntiAlias(true); paintWhite.setShader(bitmapShaderWhite); } /** * 初始化文本配置 */ private void initTextConfiguration() { Rect rect = new Rect(); paintText = new Paint(); paintText.setAntiAlias(true); paintText.setColor(textColor); paintText.setTextSize(textSize); if (!TextUtils.isEmpty(text)) { paintText.getTextBounds(text, 0, text.length(), rect); widthFont = rect.width();//文本的宽度 heightFont = rect.height();//文本的高度 } } @Override protected void onDraw(Canvas canvas) { super.onDraw(canvas); //将圆角渐变bitmap绘画到画布中 canvas.drawRoundRect(new RectF(0, 0, width, height), radius, radius, paintFillet); // 将白色Bitmap绘制到画布上面 canvas.drawRoundRect(new RectF(colorWidth, colorWidth, width - colorWidth, height - colorWidth), radius, radius, paintWhite); if (!TextUtils.isEmpty(text)) { canvas.drawText(text, (width - widthFont) / 2, (height + heightFont) / 2, paintText); } } } <com.jm.xpproject.GradientColorButton android:layout_width="120dp" android:layout_height="70dp" android:layout_margin="10dp" app:btnText="" app:btnTextColor="#123456" app:btnTextSize="18sp" app:colorRadius="50dp" app:colorWidth="5dp" />
本网页所有视频内容由 imoviebox边看边下-网页视频下载, iurlBox网页地址收藏管理器 下载并得到。
ImovieBox网页视频下载器 下载地址: ImovieBox网页视频下载器-最新版本下载
本文章由: imapbox邮箱云存储,邮箱网盘,ImageBox 图片批量下载器,网页图片批量下载专家,网页图片批量下载器,获取到文章图片,imoviebox网页视频批量下载器,下载视频内容,为您提供.
阅读和此文章类似的: 全球云计算
 官方软件产品操作指南 (170)


