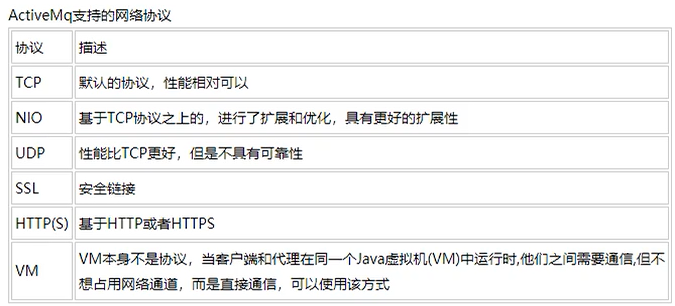
执行后,结果如下: 新需求:要求每隔3秒钟,往MQ推送消息 直接开启主启动类,间隔发送消息 执行主方法后: 先启动消费者,后启动生产者 https://activemq.apache.org/configuring-version-5-transports.html ActiveMQ支持的client-broker通讯协议有:TVP、NIO、UDP、SSL、Http(s)、VM。 注意:前两个较为重要,其余了解即可 Advanced Message Queuing Protocol,一个提供统一消息服务的应用层标准高级消息队列协议,是应用层协议的一个开放标准,为面向消息的中间件设计。基于此协议的客户端与消息中间件可传递消息,并不受客户端/中间件不同产品,不同开发语言等条件限制。 STOP,Streaming Text Orientation Message Protocol,是流文本定向消息协议,是一种为MOM(Message Oriented Middleware,面向消息中间件)设计的简单文本协议。 MQTT(Message Queuing Telemetry Transport,消息队列遥测传输)是IBM开发的一个即时通讯协议,有可能成为物联网的重要组成部分。该协议支持所有平台,几乎可以把所有联网物品和外部连接起来,被用来当作传感器和致动器(比如通过Twitter让房屋联网)的通信协议。 扩展Github:https://github.com/fusesource/mqtt-client 在 都只改动这两行即可 运行结果与前面一样,略。 问题:URI格式以”nio”开头,代表这个端口使用TCP协议为基础的NIO网络模型。 我们怎么能够让这个端口既支持NIO网络模型,又让他支持多个协议呢? 解决:使用auto关键字、使用”+”符号来为端口设置多种特性 在
消息队列学习-ActiveMQ(四)
8 SpringBoot整合ActiveMQ
8.1 队列(Queue)
8.1.1 队列生产者
工程名:boot_mq_produce
包名:com.sky.boot.activemq<?xml version="1.0" encoding="UTF-8"?> <project xmlns="https://maven.apache.org/POM/4.0.0" xmlns:xsi="https://www.w3.org/2001/XMLSchema-instance" xsi:schemaLocation="https://maven.apache.org/POM/4.0.0 https://maven.apache.org/xsd/maven-4.0.0.xsd"> <modelVersion>4.0.0</modelVersion> <parent> <groupId>org.springframework.boot</groupId> <artifactId>spring-boot-starter-parent</artifactId> <version>2.1.5.RELEASE</version> <relativePath /> </parent> <groupId>com.sky.boot.activemq</groupId> <artifactId>boot_mq_produce</artifactId> <version>1.0-SNAPSHOT</version> <dependencies> <dependency> <groupId>org.springframework.boot</groupId> <artifactId>spring-boot-starter</artifactId> </dependency> <dependency> <groupId>org.springframework.boot</groupId> <artifactId>spring-boot-starter-web</artifactId> </dependency> <dependency> <groupId>org.springframework.boot</groupId> <artifactId>spring-boot-starter-activemq</artifactId> <version>2.1.5.RELEASE</version> </dependency> <dependency> <groupId>org.springframework.boot</groupId> <artifactId>spring-boot-starter-test</artifactId> </dependency> <dependency> <groupId>junit</groupId> <artifactId>junit</artifactId> <scope>test</scope> </dependency> </dependencies> <build> <plugins> <plugin> <groupId>org.springframework.boot</groupId> <artifactId>spring-boot-maven-plugin</artifactId> </plugin> </plugins> </build> </project>
server: port: 7777 spring: activemq: broker-url: tcp://192.168.188.131:61616 user: admin password: admin jms: pub-sub-domain: false # false = Queue(默认) true = Topic # 自己定义队列名称 myqueue: boot-active-queue
@Component @EnableJms public class ConfigBean { @Value("${myqueue}") private String myQueue; @Bean public Queue queue(){ return new ActiveMQQueue(myQueue); } }
@Component public class Queue_Produce { @Autowired private JmsMessagingTemplate jmsMessagingTemplate; @Autowired private Queue queue; public void produceMsg(){ jmsMessagingTemplate.convertAndSend(queue, "*****:" + UUID.randomUUID().toString().substring(0, 6)); } }
@SpringBootApplication public class MainAppProduce { public static void main(String[] args) { SpringApplication.run(MainAppProduce.class); } }
@SpringBootTest(classes = MainAppProduce.class) @RunWith(SpringJUnit4ClassRunner.class) @WebAppConfiguration public class TestActiveMQ { @Resource private Queue_Produce queue_produce; @Test public void testSend() throws Exception{ queue_produce.produceMsg(); } }

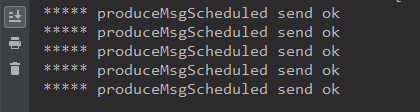
@Scheduled(fixedDelay = 3000L) public void produceMsgScheduled(){ jmsMessagingTemplate.convertAndSend(queue, "**scheduled:" + UUID.randomUUID().toString().substring(0, 6)); System.out.println("***** produceMsgScheduled send ok"); }
@SpringBootApplication @EnableScheduling public class MainAppProduce { public static void main(String[] args) { SpringApplication.run(MainAppProduce.class, args); } }
8.1.2 队列消费者
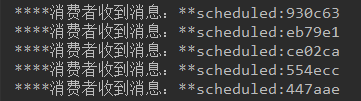
@Component public class Queue_Consumer { @JmsListener(destination = "${myqueue}") public void receive(TextMessage textMessage) throws JMSException{ System.out.println("****消费者收到消息:"+textMessage.getText()); } }
8.2 主题发布订阅(Topic)
8.2.1 Topic生产者
server: port: 6666 spring: activemq: broker-url: tcp://192.168.188.131:61616 user: admin password: admin jms: pub-sub-domain: true # false = Queue(默认) true = Topic # 自己定义队列名称 myTopic: boot-active-topic
@Component public class ConfigBean { @Value("${myTopic}") private String topicName; @Bean public Topic topic(){ return new ActiveMQTopic(topicName); } }
@Component public class Topic_Producer { @Autowired private JmsMessagingTemplate jmsMessagingTemplate; @Autowired private Topic topic; @Scheduled(fixedDelay = 3000L) public void produceTopic(){ jmsMessagingTemplate.convertAndSend(topic, "主题消息:" + UUID.randomUUID().toString().substring(0, 6)); } }
@SpringBootApplication @EnableScheduling public class BootMqToppicProducerApplication { public static void main(String[] args) { SpringApplication.run(BootMqToppicProducerApplication.class, args); } } 8.2.2 Topic消费者
server: port: 5555 # 启动第二个时,改成5566 spring: activemq: broker-url: tcp://192.168.188.131:61616 user: admin password: admin jms: pub-sub-domain: true # false = Queue(默认) true = Topic # 自己定义队列名称 myTopic: boot-active-topic
@Component public class Topic_Consumer { @JmsListener(destination = "${myTopic}") public void receive(TextMessage textMessage) throws JMSException { System.out.println("****消费者收到主题消息:"+textMessage.getText()); } }
@SpringBootApplication public class BootMqTopicConsumerApplication5555 { public static void main(String[] args) { SpringApplication.run(BootMqTopicConsumerApplication5555.class, args); } } 
9 ActiveMQ的传输协议
9.1 面试题
9.2 官网
9.3 是什么
其中配置Transport Connector的文件在ActiveMQ安装目录的conf/activemq.xml中的标签之内。
见下图实际配置:

在上文给出的配置信息中,
URI描述信息的头部都是采用协议名称:例如
描述amqp协议的监听端口时,采用的URI描述格式为“amqp://······”;
描述Stomp协议的监听端口时,采用URI描述格式为“stomp://······”;
唯独在进行openwire协议描述时,URI头却采用的“tcp://······”。这是因为ActiveMQ中默认的消息协议就是openwire9.4 有哪些
9.4.1 Transmission Control Protocol(TCP)默认
(4.1)TCP协议传输可靠性高,稳定性强
(4.2)高效率:字节流方式传递,效率很高
(4.3)有效性、可用性:应用广泛,支持任何平台9.4.2 New I/O API Protocol(NIO)
(2.1)可能有大量的Client去连接到Broker上,一般情况下,大量的Client去连接Broker是被操作系统的线程所限制的。因此,NIO的实现比TCP需要更少的线程去运行,所以建议使用NIO协议。
(2.2)可能对于Broker有一个很迟钝的网络传输,NIO比TCP提供更好的性能。9.4.3 AMQP协议
9.4.4 Stomp协议
9.4.5 Secure Sockets Layer Protocol(SSL)
9.4.6 MQTT协议
9.4.7 WS协议(websocket)
9.4.8 小总结
9.5 NIO案例演示
9.5.1 修改配置文件
transportConnectors里添加
<transportConnector name="nio" uri="nio://0.0.0.0:61618?trace=true" />

记得重启activemq9.5.2 生产和消费两端协议代码修改
private static final String ActiveMQ_URL = "nio://192.168.188.131:61618"; private static final String QUEUE_NAME = "Protocol"; 9.6 nio案例演示增强
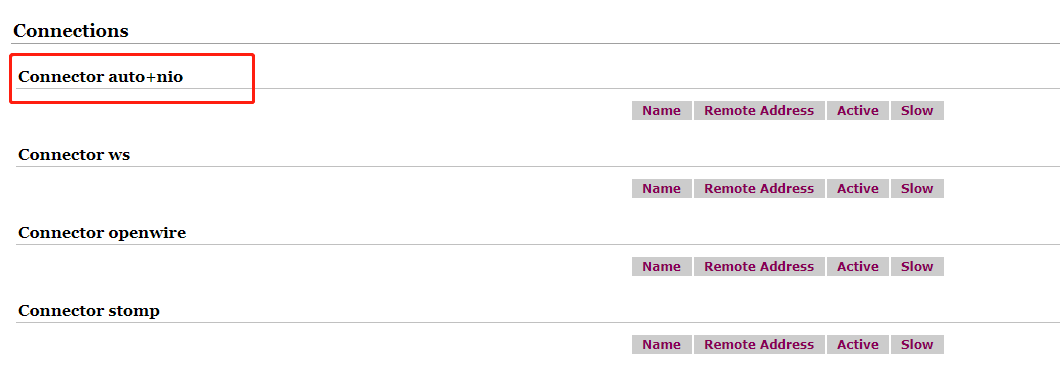
但是这样的设置方式,只能使这个端口支持Openwire协议。transportConnectors中添加<transportConnector name="auto+nio" uri="auto+nio://0.0.0.0:61608?maximumConnections=1000&wireFormat.maxFrameSize=104857600&org.apache.activemq.transport.nio.SelectorManager.corePoolSize=20&org.apache.activemq.transport.nio.SelectorManager.maximumPoolSize=50"/> 
重启activeMQ后,
本网页所有视频内容由 imoviebox边看边下-网页视频下载, iurlBox网页地址收藏管理器 下载并得到。
ImovieBox网页视频下载器 下载地址: ImovieBox网页视频下载器-最新版本下载
本文章由: imapbox邮箱云存储,邮箱网盘,ImageBox 图片批量下载器,网页图片批量下载专家,网页图片批量下载器,获取到文章图片,imoviebox网页视频批量下载器,下载视频内容,为您提供.
阅读和此文章类似的: 全球云计算
 官方软件产品操作指南 (170)


