操作系统:Linux ps:实验中所有json配置文件均放在job目录下 切换到DataX的bin目录下执行命令: 结果如下: 对于dataX的相关的json配置文件,如果不清楚其格式,可以执行 就会自动生成配置文件模板。 其中需要注意的是:1.txtfilereader中的“path”要写对。 结果如下: 为了将csv文件同步到Mysql中,需要提前建好相应的表,表结构如下: hdfs2mysql.json hdfsreader中”fileType”可以写csv。其次,mysqlreader中的”connection”中的”jdbcUrl”要写对。3306后的datax是数据库的名字。“”username”需要写对该数据库和该表具有相应权限的用户,,”password”要写对应用户的口令。 写好配置文件后,同样执行 执行成功后,在mysql中查看: 同样,在实验前先在Hbase中建好相应的表。 其中,“hbaseConfig”主要是Hbase的相关配置,在hbase-site.xml里有。然后是”rowkeyColumn”: “rowkeyColumn”:要写入的hbase的rowkey列。index:指定该列对应reader端column的索引,从0开始,若为常量index为-1;type:指定写入数据类型,用于转换HBase byte[];value:配置常量,常作为多个字段的拼接符。hbasewriter会将rowkeyColumn中所有列按照配置顺序进行拼接作为写入hbase的rowkey,不能全为常量。 什么意思呢,就是指这个“rowkeyColumn”是来设置Hbase的rowkey的,采用的是列名拼接的方式,例如实验中写的是{index:0}和{index:-1,value:”“}即将第0列的内容加上_作为rowkey的。如果写的是{index:0},{index:1},{index:-1,value:“__”},那rowkey就是第0列的内容加上”“再加上第1列的内容,以此类推。不能全为常量是因为不同的行rowkey要不一样。 对于“column”,需要注意的是必须是”列族:列名”这种格式,即使没有列名或列族,也得写成这样的格式。不能写成”Windows”,或“Windows:”。 同样,执行命令: 执行成功后,在hbase shell里查看: 上面的实验中有跨文件系统数据同步的,有跨数据库数据同步的,但DataX还可以做同类数据库数据同步的。刚好最近买的阿里云的RDS。于是打算通过Datax将本地Mysql数据同步到自己的云数据库Mysql中。 在阿里云云数据库RDS里,先申请外网地址,以便可以远程连接。 %表示任意远程主机,当然也可以写相应的ip。 如果成功进入mysql。说明配置成功。 mysql2mysql.json: 这个文件最主要的是jdbcurl要写对,而且前期准备成功即保证能远程连接mysql。 然后执行命令: 成功执行后,在云数据库中查看: 总的来说,我自己感觉DataX挺好用。如果实验中遇到问题,可以查看相应的错误信息,然后进行修改。对参数配置不确定的时候可以多看看官方文档。 (PS:第一次写博客,如有不当,请多多包涵。如果有什么建议,可以在评论区提出哦。)
DataX的简单应用实验
实验平台及相关准备
JDK版本:1.8
Python版本:2.7
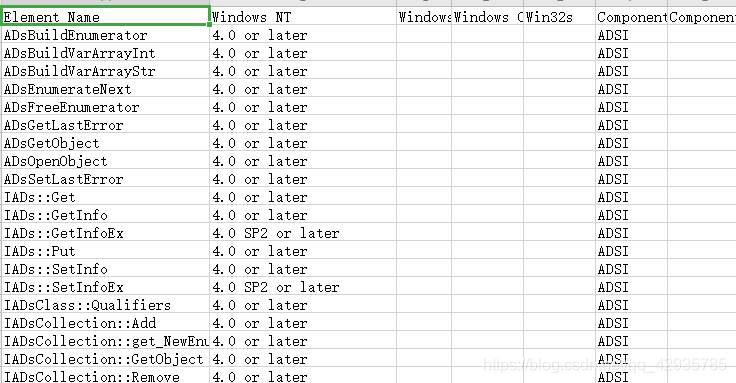
实验前准备了一个csv文件。
其部分内容如下:
实验内容
1.官方实例测试
// 前提是python已经安装成功且配置好了 python datax.py ../job/job.json
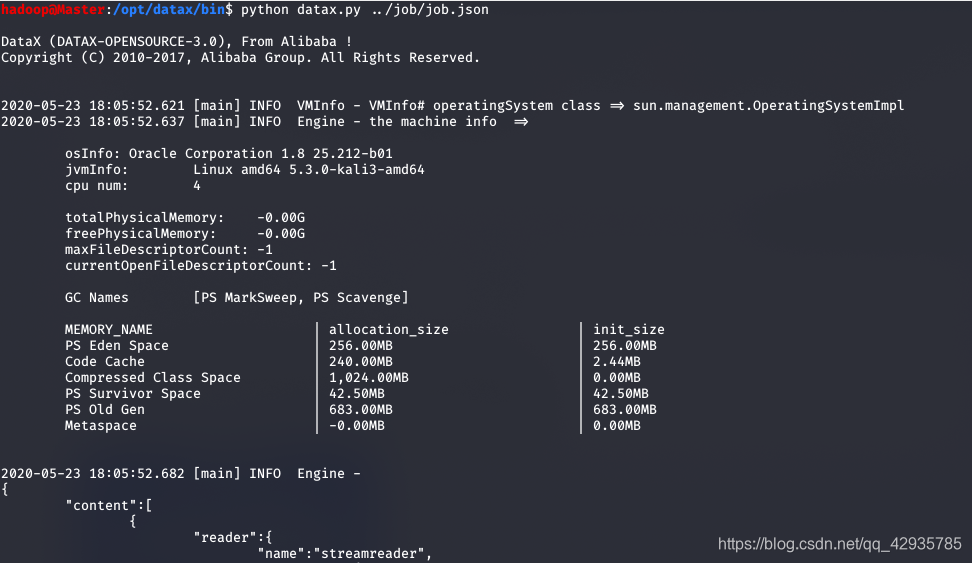

表明实例执行成功!2.通过DataX将csv文件从本地linux文件系统同步到HDFS。
python datax.py -r [reader] -w [writer]
对于其配置参数,可以到dataX官网.下 相应的reader或writer的doc里查看其详细信息。
txt2hdfs.json配置文件:{ "job": { "content": [ { "reader": { "name": "txtfilereader", "parameter": { "column": [ { "name": "Element Name", "type": "String", "index": 0 }, { "name": "Windows NT", "type": "String", "index": 1 }, { "name": "Windows", "type": "String", "index": 2 }, { "name": "Windows CE", "type": "String", "index": 3 }, { "name": "Win32s", "type": "String", "index": 4 }, { "name": "Component", "type": "String", "index": 5 }, { "name": "Component Version", "type": "String", "index": 6 }, { "name": "Header File", "type": "String", "index": 7 }, { "name": "Import Library", "type": "String", "index": 8 }, { "name": "Unicode", "type": "String", "index": 9 }, { "name": "Element Type", "type": "String", "index": 10 } ], "encoding": "UTF-8", "path": ["/home/hadoop/Desktop/WIN32API.CSV"], "csvReaderConfig": { "safetySwitch": false, "skipEmptyRecords": false, "useTextQualifier": false } } }, "writer": { "name": "hdfswriter", "parameter": { "column": [ { "name": "Element Name", "type": "String", "index": 0 }, { "name": "Windows NT", "type": "String", "index": 1 }, { "name": "Windows", "type": "String", "index": 2 }, { "name": "Windows CE", "type": "String", "index": 3 }, { "name": "Win32s", "type": "String", "index": 4 }, { "name": "Component", "type": "String", "index": 5 }, { "name": "Component Version", "type": "String", "index": 6 }, { "name": "Header File", "type": "String", "index": 7 }, { "name": "Import Library", "type": "String", "index": 8 }, { "name": "Unicode", "type": "String", "index": 9 }, { "name": "Element Type", "type": "String", "index": 10 } ], "compress": "", "defaultFS": "hdfs://Master:9000", "fieldDelimiter": ",", "fileName": "win32api.csv", "fileType": "text", "path": "/user/", "writeMode": "nonConflict" } } } ], "setting": { "speed": { "channel": "2" } } } }
2.column中的参数index指的是第几列,从0开始,而且index和value二个必须有一个,实验中写的是index。
3.type也必须有。
4.hdfswriter的”fileType”目前只有”orc”,“text”。
5.”path”指的是在hdfs里的路径,可以通过hdfs dfs -ls / 看看hdfs的目录,确保路径正确。
6.”defaultFS”是hdfs的配置,可以在 hadoop安装目录下的 core-site.xml找到,因为我实验中搭建的是分布式所以写了Master,如果是伪分布式,可以修改成localhost:9000。
然后执行python datax.py ../job/txt2hdfs.json
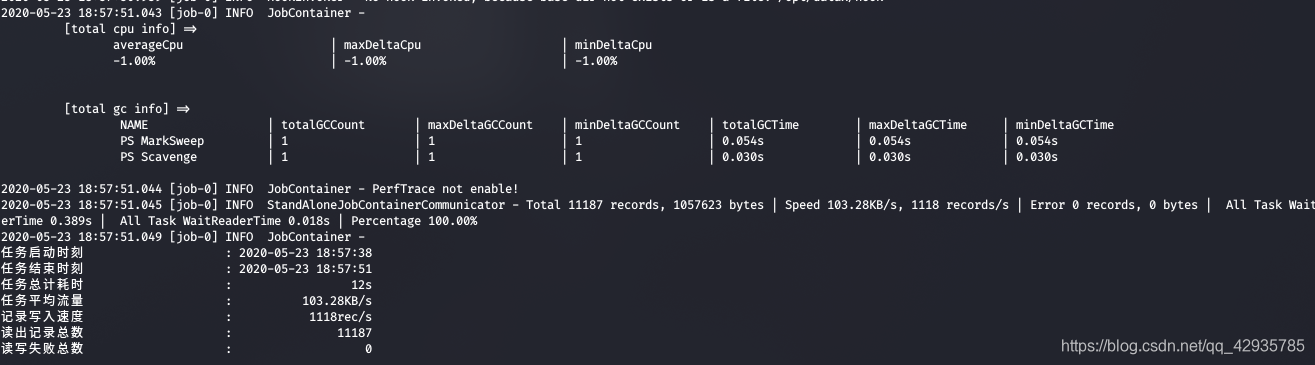
在hdfs里可以看到有如下文件:

可以用cat命令查看,发现的确是win32api.csv文件。表明实验成功!
(ps:为了下面操作方便,可以使用mv命令将文件名改成win32api.csv)3.通过DataX将HDFS里的csv文件同步到Mysql数据库中。
准备
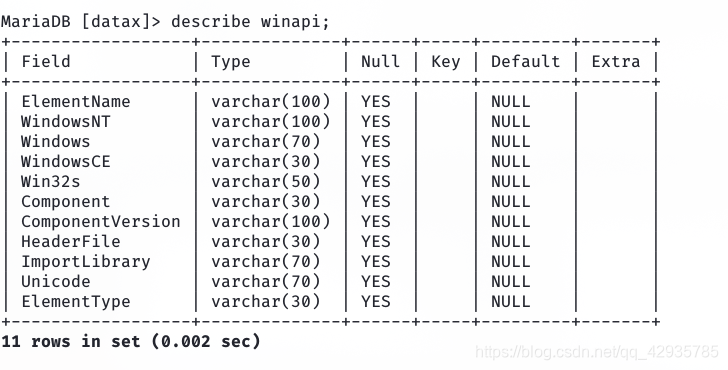
实验
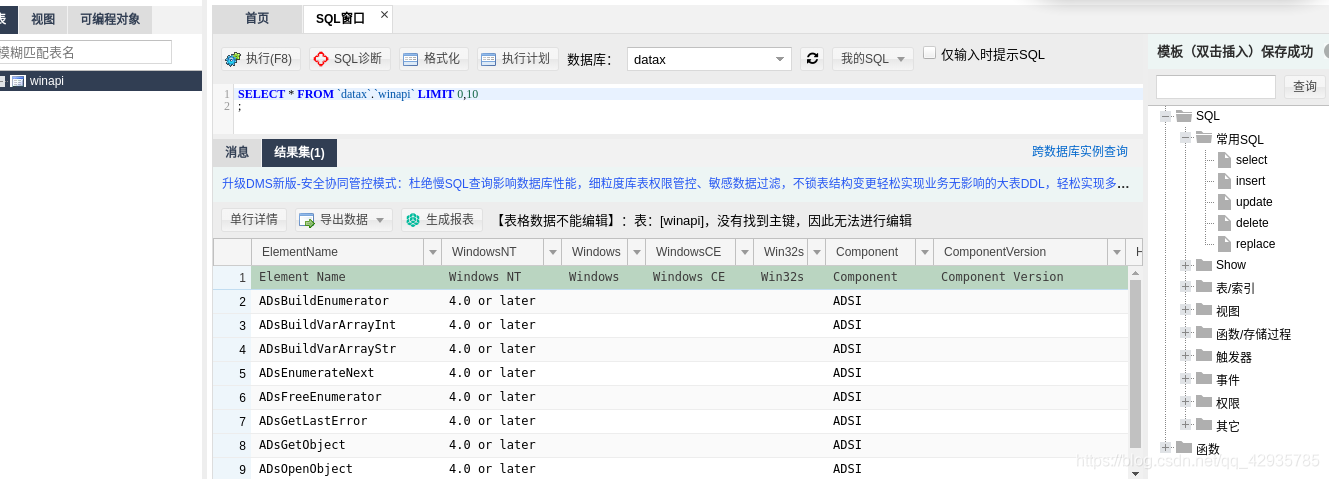
{ "job": { "content": [ { "reader": { "name": "hdfsreader", "parameter": { "column": [ { "name": "Element Name", "type": "String", "index": 0 }, { "name": "Windows NT", "type": "String", "index": 1 }, { "name": "Windows", "type": "String", "index": 2 }, { "name": "Windows CE", "type": "String", "index": 3 }, { "name": "Win32s", "type": "String", "index": 4 }, { "name": "Component", "type": "String", "index": 5 }, { "name": "Component Version", "type": "String", "index": 6 }, { "name": "Header File", "type": "String", "index": 7 }, { "name": "Import Library", "type": "String", "index": 8 }, { "name": "Unicode", "type": "String", "index": 9 }, { "name": "Element Type", "type": "String", "index": 10 } ], "defaultFS": "hdfs://Master:9000", "encoding": "UTF-8", "fieldDelimiter": ",", "fileType": "csv", "path": ["/user/win32api.csv"] } }, "writer": { "name": "mysqlwriter", "parameter": { "column": [ "ElementName","WindowsNT","Windows","WindowsCE","Win32s", "Component","ComponentVersion","HeaderFile","ImportLibrary","Unicode", "ElementType" ], "connection": [ { "jdbcUrl": "jdbc:mysql://127.0.0.1:3306/datax?useUnicode=true&characterEncoding=gbk", "table": ["winapi"] } ], "password": "******", "preSql": [], "session": [], "username": "root", "writeMode": "insert" } } } ], "setting": { "speed": { "channel": "2" } } } } python datax.py ../job/hdfs2mysql.json SELECT * FROM winapi LIMIT 0,10; 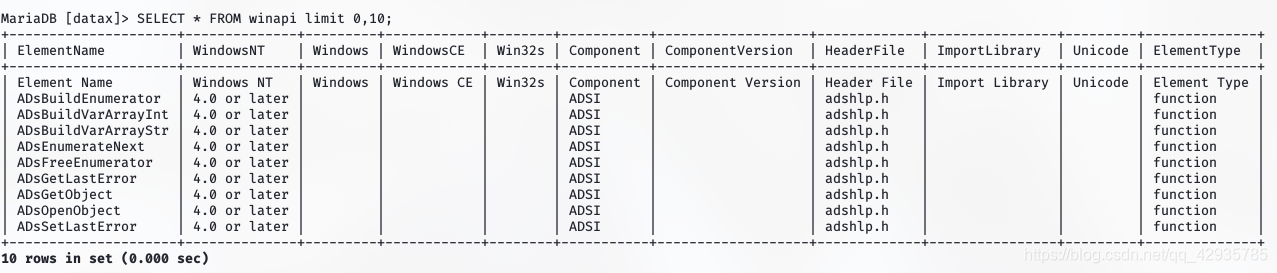
表明实验成功!
其中可能出现的错误: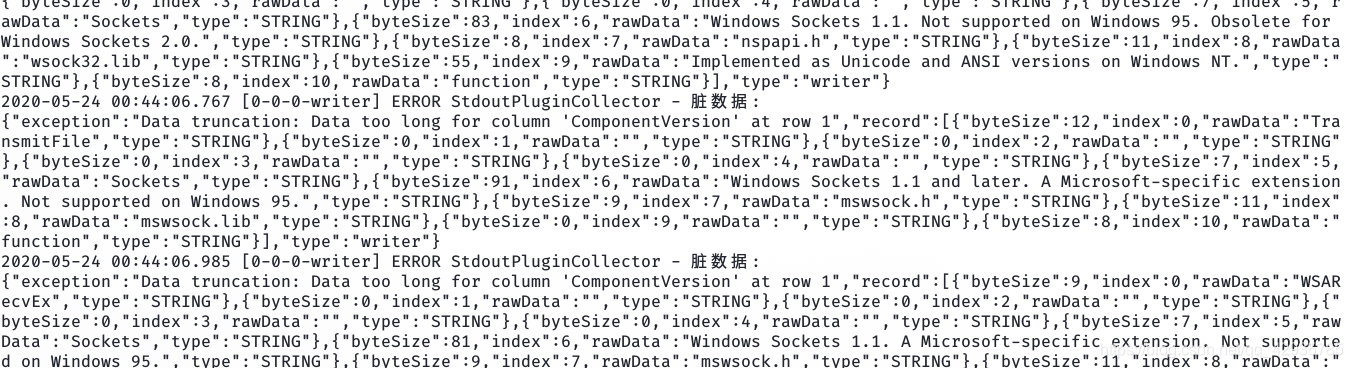
在实验中多次出现上面这个错误,通过分析得知是因为字段长度不够长,解决方法是修改mysql表的字段长度:ALTER TABLE winapi CHANGE columnname columnname VARCHAR(new_size); 4.通过DataX将Mysql数据同步到Hbase中。
mysql2hase.json:{ "job": { "setting": { "speed": { "channel": 3 }, "errorLimit": { "record": 0, "percentage": 0.02 } }, "content": [ { "reader": { "name": "mysqlreader", "parameter": { "username": "root", "password": "******", "column": [ "ElementName","WindowsNT","Windows","WindowsCE","Win32s", "Component","ComponentVersion","HeaderFile","ImportLibrary","Unicode", "ElementType" ], "connection": [ { "jdbcUrl": ["jdbc:mysql://127.0.0.1:3306/datax?useUnicode=true&characterEncoding=gbk"], "table": ["winapi"] } ] } }, "writer": { "name": "hbase11xwriter", "parameter": { "hbaseConfig": { "hbase.rootdir": "hdfs://Master:9000/hbase", "hbase.cluster.distributed": "true", "hbase.zookeeper.quorum": "Master:2181" }, "table": "winapi", "mode": "normal", "rowkeyColumn": [ { "index":0, "type": "String" } { "index":-1, "type":"string", "value":"_" } ], "column": [ { "index":0, "name": "ElementName:ElementName", "type": "string" }, { "index":1, "name": "WindowsNT:WindowsNT", "type": "string" }, { "index":2, "name": "Windows:Windows", "type": "string" }, { "index":3, "name": "WindowsCE:WindowsCE", "type": "string" }, { "index":4, "name": "Win32s:Win32s", "type": "string" }, { "index":5, "name": "Component:Component", "type": "string" }, { "index":6, "name": "ComponentVersion:ComponentVersion", "type": "string" }, { "index":7, "name": "HeaderFile:HeaderFile", "type": "string" }, { "index":8, "name": "ImportLibrary:ImportLibrary", "type": "string" }, { "index":9, "name": "Unicode:Unicode", "type": "string" }, { "index":10, "name": "ElementType:ElementType", "type": "string" } ], "encoding": "utf-8" } } } ] } }
官方文档:python datax.py ../job/mysql2hbase.json scan "winapi",{"LIMIT"=>5} 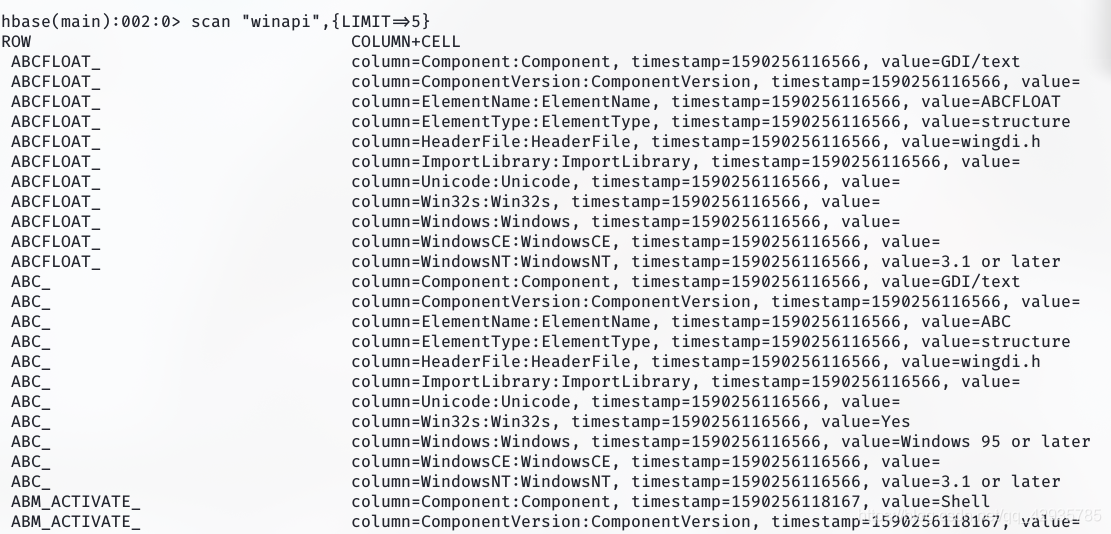
表明实验成功!5.通过Datax将本地Mysql数据同步到自己的云数据库Mysql中。
准备
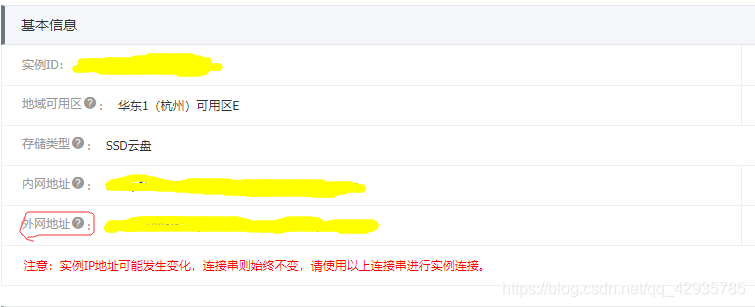
然后设置白名单将自己的ip加进去。登入数据库创建相应的表winapi。接着对用户进行授权。
相应的命令方式:GRANT [SELECT,INSERT, UPDATE, DELETE] ON database.table tO username@'%';
然后可以测试一下是否能够远程连接:mysql -h xxxxxx.mysql.rds.aliyuncs.com -u username -p 实验
{ "job": { "setting": { "speed": { "channel": 3 }, "errorLimit": { "record": 0, "percentage": 0.02 } }, "content": [ { "reader": { "name": "mysqlreader", "parameter": { "username": "root", "password": "********", "column": [ "ElementName","WindowsNT","Windows","WindowsCE","Win32s", "Component","ComponentVersion","HeaderFile","ImportLibrary","Unicode", "ElementType" ], "connection": [ { "jdbcUrl": ["jdbc:mysql://127.0.0.1:3306/datax?useUnicode=true&characterEncoding=gbk"], "table": ["winapi"] } ] } }, "writer": { "name": "mysqlwriter", "parameter": { "column": [ "ElementName","WindowsNT","Windows","WindowsCE","Win32s", "Component","ComponentVersion","HeaderFile","ImportLibrary","Unicode", "ElementType" ], "connection": [ { "jdbcUrl": "jdbc:mysql://xxxxxxxxx.mysql.rds.aliyuncs.com:3306/datax?useUnicode=true&characterEncoding=gbk", "table": ["winapi"] } ], "password": "*******", "preSql": [], "session": [], "username": "hadoop", "writeMode": "insert" } } } ] } } python datax.py ../job/mysql2mysql.json
表明实验成功!总结
本网页所有视频内容由 imoviebox边看边下-网页视频下载, iurlBox网页地址收藏管理器 下载并得到。
ImovieBox网页视频下载器 下载地址: ImovieBox网页视频下载器-最新版本下载
本文章由: imapbox邮箱云存储,邮箱网盘,ImageBox 图片批量下载器,网页图片批量下载专家,网页图片批量下载器,获取到文章图片,imoviebox网页视频批量下载器,下载视频内容,为您提供.
阅读和此文章类似的: 全球云计算
 官方软件产品操作指南 (170)


