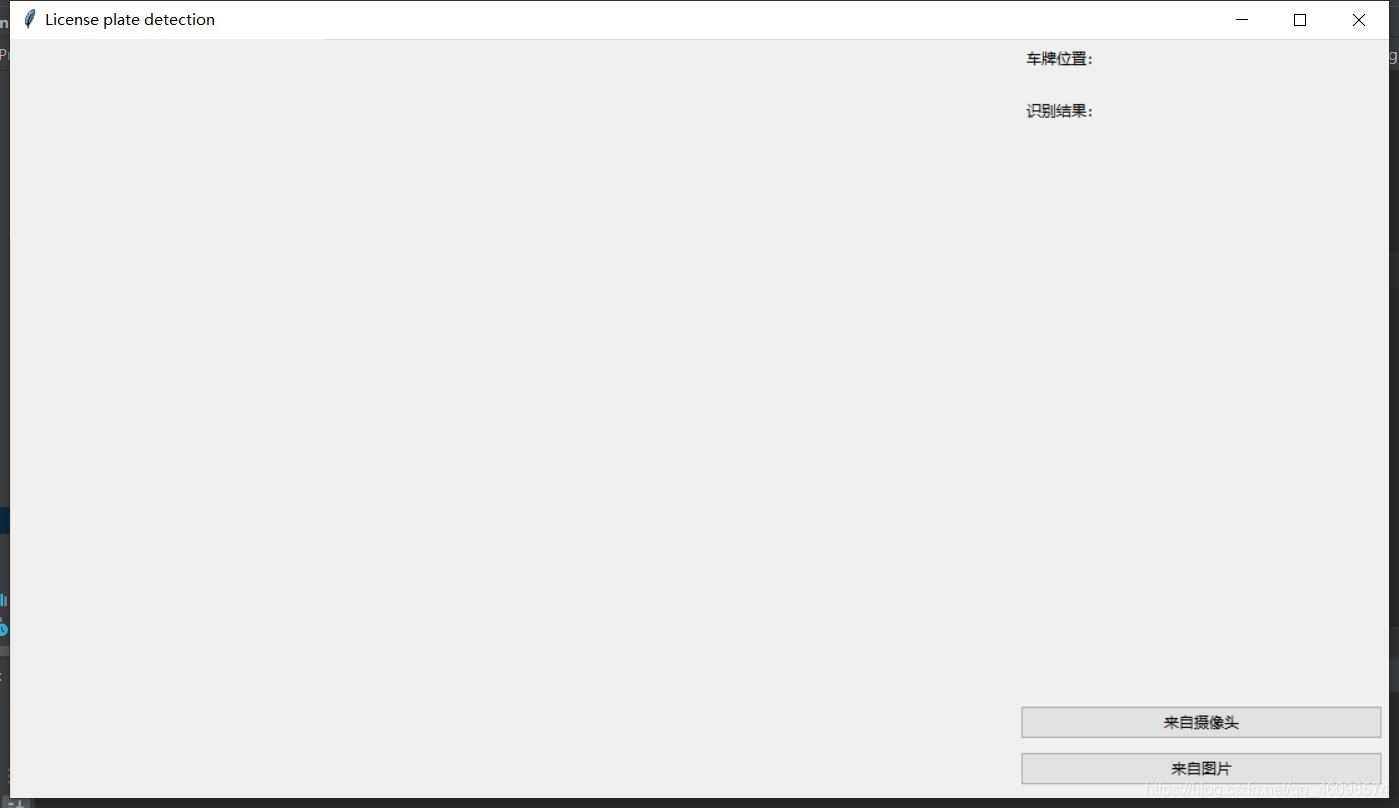
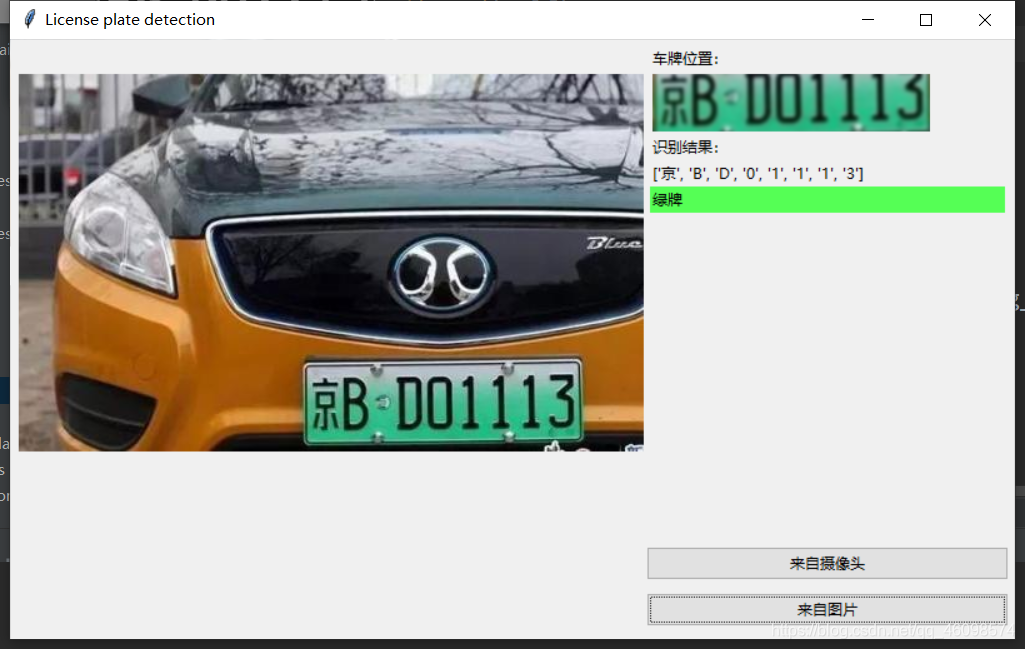
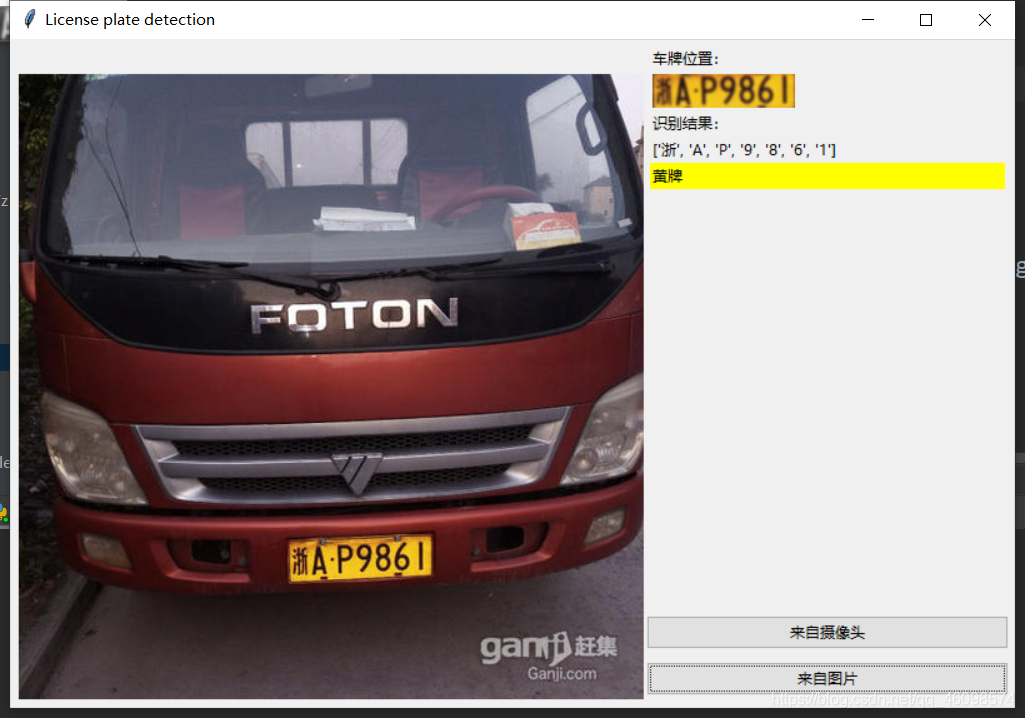
前两篇博客比较仓促,今天我把全部整理了一遍,流程图过程也全部展现,让大家更好的明白流程 调用Opencv的SVM OpenCV(开源计算机视觉库:https://opencv.org)是一个bsd授权的开源库,包含数百种计算机视觉算法。该文件描述了所谓的opencv2。x API,本质上是一个c++ API,而不是基于C的OpenCV 1。x API(自OpenCV 2.4发布以来,C API被弃用,并且没有使用“C”编译器进行测试) Python与C/ c++这样的语言相比,Python要慢一些,但是Python可以很容易地使用C/ c++进行扩展,这允许我们用C/ c++编写计算密集型代码,并创建可以用作Python模块的Python包装器。这给了我们两个好处:首先,代码和原始的C/c++代码一样快(因为Python在后台工作的代码实际上是c++代码);其次,用Python编写代码比用C/c++更容易。 OpenCV支持多种编程语言,如c++、Python、Java等,可以在不同的平台上使用,包括Windows、Linux、OS X、Android和iOS。基于CUDA和OpenCL的高速GPU操作接口也在积极开发中。 OpenCV-Python是OpenCV的Python API,是原始OpenCV c++实现的Python包装器。结合了OpenCV c++ API和Python语言的最佳特性。 支持向量机(Support Vector Machine, SVM)的基本模型是在特征空间上找到最佳的分离超平面使得训练集上正负样本间隔最大。SVM是用来解决二分类问题的有监督学习算法(实际上还有多分类),在引入了核方法之后SVM也可以用来解决非线性问题。 硬间隔支持向量机(线性可分支持向量机):当训练数据线性可分时,可通过硬间隔最大化学得一个线性可分支持向量机。 它在解决小样本、非线性及高维模式识别中表现出许多特有的优势,并能够推广应用到函数拟合等其他机器学习问题中。 支持向量机方法是建立在统计学习理论的VC维理论和结构风险最小原理基础上的,根据有限的样本信息在模式的复杂性(即对特定训练样本的学习精度,Accurary)和学习能力(即无错误地识别任意样本的能力)之间寻求最佳折衷,以期获得最好的推广能力。 换句话说,给定一些标记(label)号的训练样本,SVM算法输出一个最优化的分隔超平面。 setGamma(gamma),设置Gamma参数,demo中是0.5 setC(C), 设置惩罚项, 为:1 setKernel(cv2.ml.SVM_RBF):设置核函数:RBF setType(cv2.ml.SVM_C_SVC):设置SVM的模型类型:SVC是分类模型,SVR是回归模型 接下来继续走: 1:定义 2: 调用方法,并且喂数据: 这边已经训练好模型就执行IF语句中的load操作(常用的调取持久化模型的方法),否则要是没有模型就开始训练(喂数据): 调用的相对路径是:”trainchars2是数据集: 这是从1-9,A到Z的数据集~ 有点像MNIST手写数字体有木有! 比如A: 这些是字母的训练数据,同样的还有我们车牌的省份简写: 来看一个:广西的简称:桂 解读一下: os.walk方法,主要用来遍历一个目录内各个子目录和子文件。 可以得到一个三元tupple(dirpath, dirnames, filenames), 我们这里换名了: root, dirs, files 第一个为起始路径,第二个为起始路径下的文件夹,第三个是起始路径下的文件。 dirpath 是一个string,代表目录的路径, dirnames 是一个list,包含了dirpath下所有子目录的名字。 filenames 是一个list,包含了非目录文件的名字。 这些名字不包含路径信息,如果需要得到全路径,需要使用os.path.join(dirpath, name). os.path.basename(),返回path最后的文件名。若path以/或结尾,那么就会返回空值。 标好了训练集和标签,就可以“喂”给分类器了: 接下来:测试 大致是做了以下步骤: 高斯滤波器是一种线性滤波器,能够有效的抑制噪声,平滑图像。其作用原理和均值滤波器类似,都是取滤波器窗口内的像素的均值作为输出。其窗口模板的系数和均值滤波器不同,均值滤波器的模板系数都是相同的为1;而高斯滤波器的模板系数,则随着距离模板中心的增大而系数减小。所以,高斯滤波器相比于均值滤波器对图像个模糊程度较小。 灰度处理: 图像开运算与闭运算与膨胀和腐蚀运算有关,由膨胀和腐蚀两个运算的复合与集合操作(并、交、补等)组合成的运算构成。开运算与闭运算依据腐蚀和膨胀演变而来。 1)开运算:先对图像腐蚀后膨胀。 A○S= (AΘS)⊕ S 作用:用来消除小的物体,平滑形状边界,并且不改变其面积。可以去除小颗粒噪声,断开物体之间的粘连。 2)闭运算:先对图像膨胀后腐蚀 A●S= (A⊕S)Θ S 作用:用来填充物体内的小空洞,连接邻近的物体,连接断开的轮廓线,平滑其边界的同时不改变面积。 融合开运算和闭运算: 上面这两步是视觉的常用的基本操作,经常用于数据(图像)预处理 接下来继续车牌检测~ 查找图像边缘整体形成的矩形区域,可能有很多,车牌就在其中一个矩形区域中: 需要注意的是cv2.findContours()函数接受的参数为二值图,即黑白的(不是灰度图),所以读取的图像要先转成灰度的,再转成二值图! 结果筛选(原因是上述的多可能性情况): 接下来: 矩形区域可能是倾斜的矩形,需要矫正,以便使用颜色定位 开始使用颜色定位,排除不是车牌的矩形,目前识别蓝、绿、黄车牌 部分代码有注释,大致说说: 这是识别车牌中的字符 这个是掩膜方法,我们后续再介绍吧, 大致思路就是把原图中要放logo的区域抠出来,再把logo放进去就行了。 根据设定的阈值和图片直方图,找出波峰,用于分隔字符 根据找出的波峰,分隔图片,从而得到逐个字符图片: 最后,结果筛选: 返回识别到的字符、定位的车牌图像、车牌颜色: main函数: 小结一下: 最后使用UI的库:tkinter绘制一个简易界面: 新能源的绿牌汽车车牌检测成功 黄车车牌检测成功 最后说说识别准确率,我在数百张验证集中测试,准确率大致在75左右!这是使用经典机器学习算法带来的缺点,不过他的优点是十分迅速,在极端情况下只需要0.3秒检测成功,但是他容易欠拟合,泛化能力不强,这也是需要改进的,比如数据增强,加大训练集等!继续进步
都说深度学习的出现极力地打压着传统机器学习算法的地位,作为一个二刷机器学习经典算法的小伙伴告诉你:还真多半是这样,咳,毕竟还是差距较大,深度学习处理真实世界多维度的问题更权威!不过,有的事情还是机器学习能做的,经典永不过时,下面我们来做一个实践。
,篇幅字数上万,建议细品!我们来看看车牌检测基本的识别流程:

我使用的是OpenCv自带的SVM模型,由于SVM的突出表现,得到了更多官方的青睐,就诞生出了很多方便使用的封装,正如Opencv的SVM封装。

核心代码介绍:
一般SVM有下面三种:
软间隔支持向量机:当训练数据近似线性可分时,可通过软间隔最大化学得一个线性支持向量机。
非线性支持向量机:当训练数据线性不可分时,可通过核方法以及软间隔最大化学得一个非线性支持向量机。 SVM实质上是一个类分类器,是一个能够将不同类样本在样本空间分隔的超平面。 class SVM(StatModel): def __init__(self, C = 1, gamma = 0.5): self.model = cv2.ml.SVM_create() self.model.setGamma(gamma) self.model.setC(C) self.model.setKernel(cv2.ml.SVM_RBF) self.model.setType(cv2.ml.SVM_C_SVC) 这边的cv2.ml.SVM_create()生成一个SVM模型
训练svmclass SVM(StatModel): def __init__(self, C = 1, gamma = 0.5): self.model = cv2.ml.SVM_create() self.model.setGamma(gamma) self.model.setC(C) self.model.setKernel(cv2.ml.SVM_RBF) self.model.setType(cv2.ml.SVM_C_SVC) #训练svm def train(self, samples, responses): self.model.train(samples, cv2.ml.ROW_SAMPLE, responses) def train_svm(self): #识别英文字母和数字 self.model = SVM(C=1, gamma=0.5) #识别中文 self.modelchinese = SVM(C=1, gamma=0.5) if os.path.exists("svm.dat"): self.model.load("svm.dat") else: chars_train = [] chars_label = [] for root, dirs, files in os.walk("train\chars2"): if len(os.path.basename(root)) > 1: continue root_int = ord(os.path.basename(root)) for filename in files: filepath = os.path.join(root,filename) digit_img = cv2.imread(filepath) digit_img = cv2.cvtColor(digit_img, cv2.COLOR_BGR2GRAY) chars_train.append(digit_img) #chars_label.append(1) chars_label.append(root_int) chars_train = list(map(deskew, chars_train)) chars_train = preprocess_hog(chars_train) #chars_train = chars_train.reshape(-1, 20, 20).astype(np.float32) chars_label = np.array(chars_label) print(chars_train.shape) self.model.train(chars_train, chars_label)


在此分成了SVC分别训练省份简称和右边的英文字符和数字
def train_svm(self): #识别英文字母和数字 self.model = SVM(C=1, gamma=0.5) #识别中文 self.modelchinese = SVM(C=1, gamma=0.5) if os.path.exists("svm.dat"): self.model.load("svm.dat") else: chars_train = [] chars_label = [] for root, dirs, files in os.walk("train\chars2"): if len(os.path.basename(root)) > 1: continue root_int = ord(os.path.basename(root)) for filename in files: filepath = os.path.join(root,filename) digit_img = cv2.imread(filepath) digit_img = cv2.cvtColor(digit_img, cv2.COLOR_BGR2GRAY) chars_train.append(digit_img) #chars_label.append(1) chars_label.append(root_int) chars_train = list(map(deskew, chars_train)) chars_train = preprocess_hog(chars_train) #chars_train = chars_train.reshape(-1, 20, 20).astype(np.float32) chars_label = np.array(chars_label) print(chars_train.shape) self.model.train(chars_train, chars_label) if os.path.exists("svmchinese.dat"): self.modelchinese.load("svmchinese.dat") else: chars_train = [] chars_label = [] for root, dirs, files in os.walk("train\charsChinese"): if not os.path.basename(root).startswith("zh_"): continue pinyin = os.path.basename(root) index = provinces.index(pinyin) + PROVINCE_START + 1 #1是拼音对应的汉字 for filename in files: filepath = os.path.join(root,filename) digit_img = cv2.imread(filepath) digit_img = cv2.cvtColor(digit_img, cv2.COLOR_BGR2GRAY) chars_train.append(digit_img) #chars_label.append(1) chars_label.append(index) chars_train = list(map(deskew, chars_train)) chars_train = preprocess_hog(chars_train) #chars_train = chars_train.reshape(-1, 20, 20).astype(np.float32) chars_label = np.array(chars_label) print(chars_train.shape) self.modelchinese.train(chars_train, chars_label) 同上的,先判断我们本地是否训练好了,免得多此一举,同样的
os.walk(top, topdown=True, onerror=None, followlinks=False) self.modelchinese.train(chars_train, chars_label) 特征提取:获取车牌的可能位置(以下为根据车牌颜色再定位,缩小边缘非车牌边界)
def accurate_place(self, card_img_hsv, limit1, limit2, color): row_num, col_num = card_img_hsv.shape[:2] xl = col_num xr = 0 yh = 0 yl = row_num #col_num_limit = self.cfg["col_num_limit"] row_num_limit = self.cfg["row_num_limit"] col_num_limit = col_num * 0.8 if color != "green" else col_num * 0.5#绿色有渐变 for i in range(row_num): count = 0 for j in range(col_num): H = card_img_hsv.item(i, j, 0) S = card_img_hsv.item(i, j, 1) V = card_img_hsv.item(i, j, 2) if limit1 < H <= limit2 and 34 < S and 46 < V: count += 1 if count > col_num_limit: if yl > i: yl = i if yh < i: yh = i for j in range(col_num): count = 0 for i in range(row_num): H = card_img_hsv.item(i, j, 0) S = card_img_hsv.item(i, j, 1) V = card_img_hsv.item(i, j, 2) if limit1 < H <= limit2 and 34 < S and 46 < V: count += 1 if count > row_num - row_num_limit: if xl > j: xl = j if xr < j: xr = j print('size111', xl, xr, yh, yl) return xl, xr, yh, yl def predict(self, car_pic): if type(car_pic) == type(""): img = imreadex(car_pic) else: img = car_pic pic_hight, pic_width = img.shape[:2] if pic_width > MAX_WIDTH: resize_rate = MAX_WIDTH / pic_width img = cv2.resize(img, (MAX_WIDTH, int(pic_hight*resize_rate)), interpolation=cv2.INTER_AREA) print('tuxing', img.shape[0],img.shape[1]) 传入车子图片
判定图片完整性
处理或重读图片
使用img.shape方式获取图片的高和宽
超出自定义最大高宽,就resize操作,接下来 边缘计算:
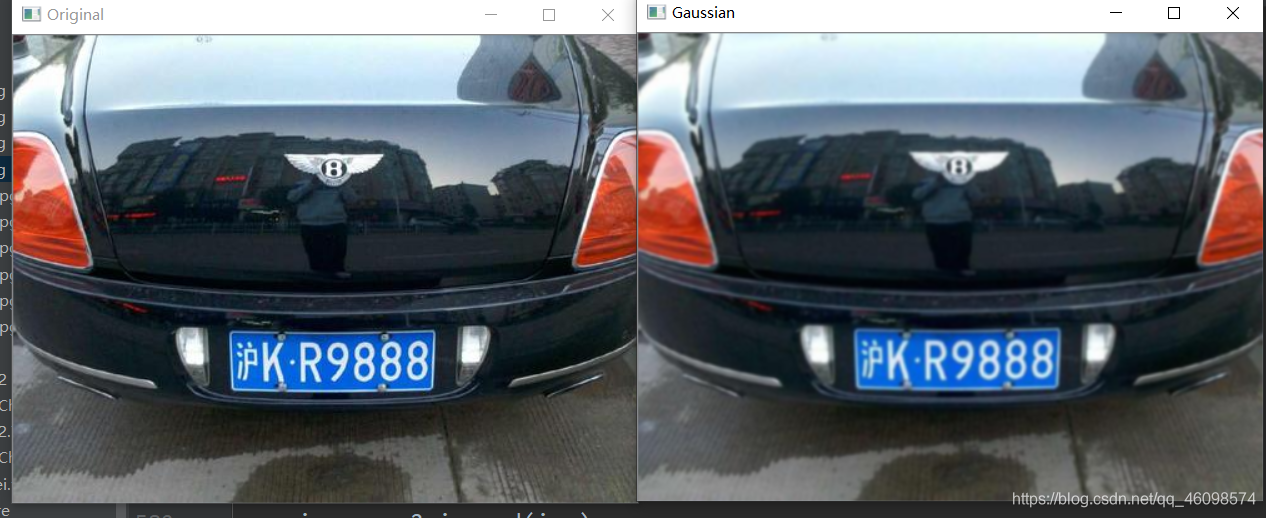
blur = self.cfg["blur"] #高斯去噪 if blur > 0: img = cv2.GaussianBlur(img, (blur, blur), 0)#图片分辨率调整 oldimg = img img = cv2.cvtColor(img, cv2.COLOR_BGR2GRAY) #equ = cv2.equalizeHist(img) #img = np.hstack((img, equ)) #去掉图像中不会是车牌的区域 kernel = np.ones((20, 20), np.uint8) img_opening = cv2.morphologyEx(img, cv2.MORPH_OPEN, kernel) img_opening = cv2.addWeighted(img, 1, img_opening, -1, 0); #找到图像边缘 ret, img_thresh = cv2.threshold(img_opening, 0, 255, cv2.THRESH_BINARY + cv2.THRESH_OTSU) img_edge = cv2.Canny(img_thresh, 100, 200) #使用开运算和闭运算让图像边缘成为一个整体 kernel = np.ones((self.cfg["morphologyr"], self.cfg["morphologyc"]), np.uint8) img_edge1 = cv2.morphologyEx(img_edge, cv2.MORPH_CLOSE, kernel) img_edge2 = cv2.morphologyEx(img_edge1, cv2.MORPH_OPEN, kernel) 高斯去噪:
高斯滤波的基本思想是: 图像上的每一个像素点的值,都由其本身和邻域内其他像素点的值经过加权平均后得到。其具体操作是,用一个核(又称为卷积核、掩模、矩阵)扫描图像中每一个像素点,将邻域内各个像素值与对应位置的权值相称并求和。从数学的角度来看,高斯滤波的过程是图像与高斯正态分布做卷积操作。
注意: 高斯滤波是将二维高斯正态分布放在图像矩阵上做卷积运算。考虑的是邻域内像素值的空间距离关系,因此对彩色图像处理时应分通道进行操作,也就是说操作的图像原矩阵时用单通道数据,最后合并为彩色图像。
效果如图:右边是高斯模糊降噪处理:
图片分辨率调整
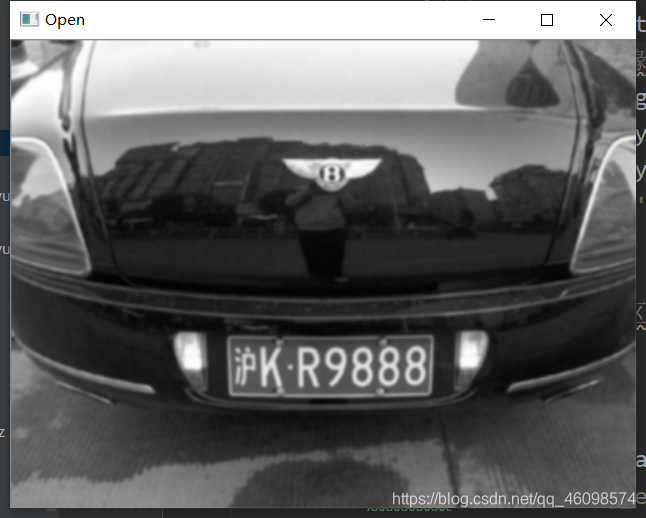
灰度是指把白色与黑色之间按对数关系分为若干个等级,一般我们将灰度分为256阶(0-255)。用灰度表示的图像就叫做灰度图。 
图像裁剪(去掉图像中不会是车牌的区域)
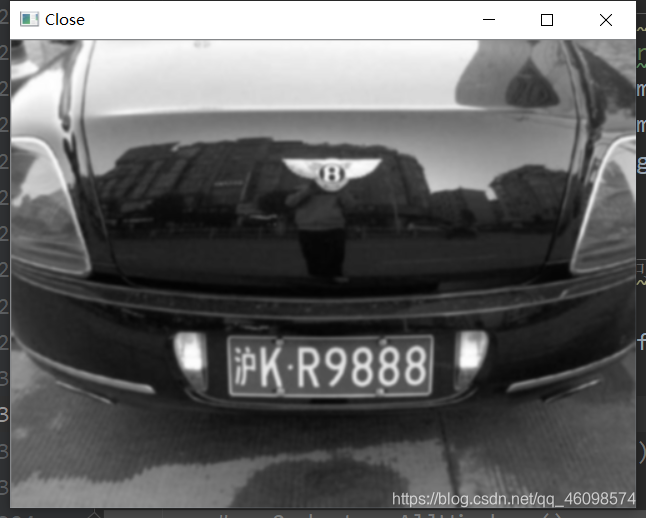
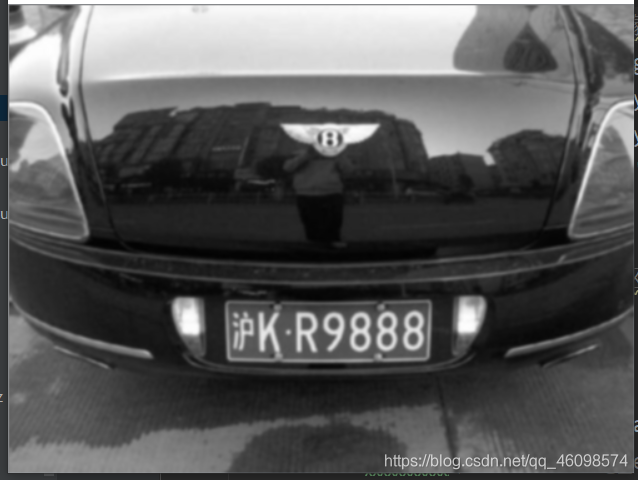
使用开运算和闭运算让图像边缘成为一个整体:
二值化操作找到图像边缘:
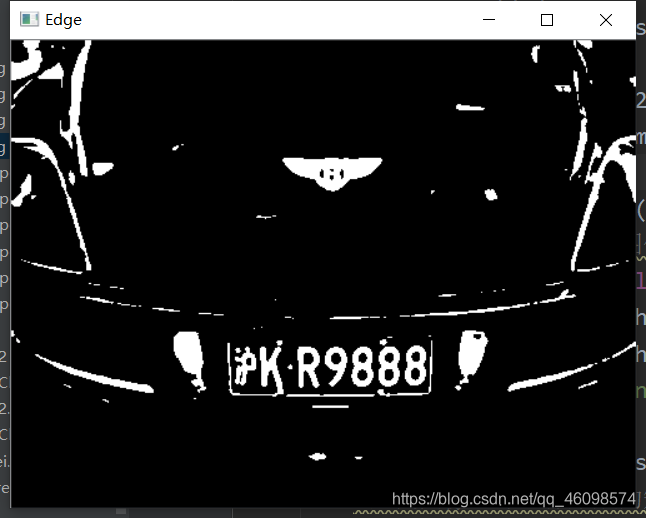
例如: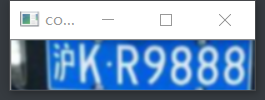
try: contours, hierarchy = cv2.findContours(img_edge2, cv2.RETR_TREE, cv2.CHAIN_APPROX_SIMPLE) except ValueError: image, contours, hierarchy = cv2.findContours(img_edge2, cv2.RETR_TREE, cv2.CHAIN_APPROX_SIMPLE) contours = [cnt for cnt in contours if cv2.contourArea(cnt) > Min_Area] car_contours = [] for cnt in contours: rect = cv2.minAreaRect(cnt) area_width, area_height = rect[1] if area_width < area_height: area_width, area_height = area_height, area_width wh_ratio = area_width / area_height #print(wh_ratio) #要求矩形区域长宽比在2到5.5之间,2到5.5是车牌的长宽比,其余的矩形排除 if wh_ratio > 2 and wh_ratio < 5.5: car_contours.append(rect) box = cv2.boxPoints(rect) box = np.int0(box) for rect in car_contours: if rect[2] > -1 and rect[2] < 1:#创造角度,使得左、高、右、低拿到正确的值 angle = 1 else: angle = rect[2] rect = (rect[0], (rect[1][0]+5, rect[1][1]+5), angle)#扩大范围,避免车牌边缘被排除 box = cv2.boxPoints(rect) heigth_point = right_point = [0, 0] left_point = low_point = [pic_width, pic_hight] for point in box: if left_point[0] > point[0]: left_point = point if low_point[1] > point[1]: low_point = point if heigth_point[1] < point[1]: heigth_point = point if right_point[0] < point[0]: right_point = point if left_point[1] <= right_point[1]:#正角度 new_right_point = [right_point[0], heigth_point[1]] pts2 = np.float32([left_point, heigth_point, new_right_point])#字符只是高度需要改变 pts1 = np.float32([left_point, heigth_point, right_point]) M = cv2.getAffineTransform(pts1, pts2) dst = cv2.warpAffine(oldimg, M, (pic_width, pic_hight)) point_limit(new_right_point) point_limit(heigth_point) point_limit(left_point) card_img = dst[int(left_point[1]):int(heigth_point[1]), int(left_point[0]):int(new_right_point[0])] card_imgs.append(card_img) elif left_point[1] > right_point[1]:#负角度 new_left_point = [left_point[0], heigth_point[1]] pts2 = np.float32([new_left_point, heigth_point, right_point])#字符只是高度需要改变 pts1 = np.float32([left_point, heigth_point, right_point]) M = cv2.getAffineTransform(pts1, pts2) dst = cv2.warpAffine(oldimg, M, (pic_width, pic_hight)) point_limit(right_point) point_limit(heigth_point) point_limit(new_left_point) card_img = dst[int(right_point[1]):int(heigth_point[1]), int(new_left_point[0]):int(right_point[0])] card_imgs.append(card_img) colors = [] for card_index,card_img in enumerate(card_imgs): green = yello = blue = black = white = 0 card_img_hsv = cv2.cvtColor(card_img, cv2.COLOR_BGR2HSV) #有转换失败的可能,原因来自于上面矫正矩形出错 if card_img_hsv is None: continue row_num, col_num= card_img_hsv.shape[:2] card_img_count = row_num * col_num for i in range(row_num): for j in range(col_num): H = card_img_hsv.item(i, j, 0) S = card_img_hsv.item(i, j, 1) V = card_img_hsv.item(i, j, 2) if 11 < H <= 34 and S > 34:#图片分辨率调整 yello += 1 elif 35 < H <= 99 and S > 34:#图片分辨率调整 green += 1 elif 99 < H <= 124 and S > 34:#图片分辨率调整 blue += 1 if 0 < H <180 and 0 < S < 255 and 0 < V < 46: black += 1 elif 0 < H <180 and 0 < S < 43 and 221 < V < 225: white += 1 color = "no" limit1 = limit2 = 0 if yello*2 >= card_img_count: color = "yello" limit1 = 11 limit2 = 34#有的图片有色偏偏绿 elif green*2 >= card_img_count: color = "green" limit1 = 35 limit2 = 99 elif blue*2 >= card_img_count: color = "blue" limit1 = 100 limit2 = 124#有的图片有色偏偏紫 elif black + white >= card_img_count*0.7:#TODO color = "bw" print(color) colors.append(color) print(blue, green, yello, black, white, card_img_count) cv2.imshow("color", card_img) cv2.waitKey(1110) if limit1 == 0: continue #以上为确定车牌颜色 #以下为根据车牌颜色再定位,缩小边缘非车牌边界 xl, xr, yh, yl = self.accurate_place(card_img_hsv, limit1, limit2, color) if yl == yh and xl == xr: continue need_accurate = False if yl >= yh: yl = 0 yh = row_num need_accurate = True if xl >= xr: xl = 0 xr = col_num need_accurate = True card_imgs[card_index] = card_img[yl:yh, xl:xr] if color != "green" or yl < (yh-yl)//4 else card_img[yl-(yh-yl)//4:yh, xl:xr] if need_accurate:#可能x或y方向未缩小,需要再试一次 card_img = card_imgs[card_index] card_img_hsv = cv2.cvtColor(card_img, cv2.COLOR_BGR2HSV) xl, xr, yh, yl = self.accurate_place(card_img_hsv, limit1, limit2, color) print('size', xl,xr,yh,yl) if yl == yh and xl == xr: continue if yl >= yh: yl = 0 yh = row_num if xl >= xr: xl = 0 xr = col_num card_imgs[card_index] = card_img[yl:yh, xl:xr] if color != "green" or yl < (yh-yl)//4 else card_img[yl-(yh-yl)//4:yh, xl:xr] 核心部分来了,详解一下:
predict_result = [] roi = None card_color = None for i, color in enumerate(colors): if color in ("blue", "yello", "green"): card_img = card_imgs[i] gray_img = cv2.cvtColor(card_img, cv2.COLOR_BGR2GRAY) #黄、绿车牌字符比背景暗、与蓝车牌刚好相反,所以黄、绿车牌需要反向 if color == "green" or color == "yello": gray_img = cv2.bitwise_not(gray_img) ret, gray_img = cv2.threshold(gray_img, 0, 255, cv2.THRESH_BINARY + cv2.THRESH_OTSU) #查找水平直方图波峰 x_histogram = np.sum(gray_img, axis=1) x_min = np.min(x_histogram) x_average = np.sum(x_histogram)/x_histogram.shape[0] x_threshold = (x_min + x_average)/2 wave_peaks = find_waves(x_threshold, x_histogram) if len(wave_peaks) == 0: print("peak less 0:") continue #认为水平方向,最大的波峰为车牌区域 wave = max(wave_peaks, key=lambda x:x[1]-x[0]) gray_img = gray_img[wave[0]:wave[1]] #查找垂直直方图波峰 row_num, col_num= gray_img.shape[:2] #去掉车牌上下边缘1个像素,避免白边影响阈值判断 gray_img = gray_img[1:row_num-1] y_histogram = np.sum(gray_img, axis=0) y_min = np.min(y_histogram) y_average = np.sum(y_histogram)/y_histogram.shape[0] y_threshold = (y_min + y_average)/5#U和0要求阈值偏小,否则U和0会被分成两半 wave_peaks = find_waves(y_threshold, y_histogram) #for wave in wave_peaks: # cv2.line(card_img, pt1=(wave[0], 5), pt2=(wave[1], 5), color=(0, 0, 255), thickness=2) #车牌字符数应大于6 if len(wave_peaks) <= 6: print("peak less 1:", len(wave_peaks)) continue wave = max(wave_peaks, key=lambda x:x[1]-x[0]) max_wave_dis = wave[1] - wave[0] #判断是否是左侧车牌边缘 if wave_peaks[0][1] - wave_peaks[0][0] < max_wave_dis/3 and wave_peaks[0][0] == 0: wave_peaks.pop(0) #组合分离汉字 cur_dis = 0 for i,wave in enumerate(wave_peaks): if wave[1] - wave[0] + cur_dis > max_wave_dis * 0.6: break else: cur_dis += wave[1] - wave[0] if i > 0: wave = (wave_peaks[0][0], wave_peaks[i][1]) wave_peaks = wave_peaks[i+1:] wave_peaks.insert(0, wave) #去除车牌上的分隔点 point = wave_peaks[2] if point[1] - point[0] < max_wave_dis/3: point_img = gray_img[:,point[0]:point[1]] if np.mean(point_img) < 255/5: wave_peaks.pop(2) if len(wave_peaks) <= 6: print("peak less 2:", len(wave_peaks)) continue part_cards = seperate_card(gray_img, wave_peaks) for i, part_card in enumerate(part_cards): #可能是固定车牌的铆钉 if np.mean(part_card) < 255/5: print("a point") continue part_card_old = part_card w = abs(part_card.shape[1] - SZ)//2 part_card = cv2.copyMakeBorder(part_card, 0, 0, w, w, cv2.BORDER_CONSTANT, value = [0,0,0]) part_card = cv2.resize(part_card, (SZ, SZ), interpolation=cv2.INTER_AREA) #part_card = deskew(part_card) part_card = preprocess_hog([part_card]) if i == 0: resp = self.modelchinese.predict(part_card) charactor = provinces[int(resp[0]) - PROVINCE_START] else: resp = self.model.predict(part_card) charactor = chr(resp[0]) #判断最后一个数是否是车牌边缘,假设车牌边缘被认为是1 if charactor == "1" and i == len(part_cards)-1: if part_card_old.shape[0]/part_card_old.shape[1] >= 7:#1太细,认为是边缘 continue predict_result.append(charactor) roi = card_img card_color = color break return predict_result, roi, card_color#识别到的字符、定位的车牌图像、车牌颜色 gray_img = cv2.bitwise_not(gray_img) def find_waves(threshold, histogram): up_point = -1#上升点 is_peak = False if histogram[0] > threshold: up_point = 0 is_peak = True wave_peaks = [] for i,x in enumerate(histogram): if is_peak and x < threshold: if i - up_point > 2: is_peak = False wave_peaks.append((up_point, i)) elif not is_peak and x >= threshold: is_peak = True up_point = i if is_peak and up_point != -1 and i - up_point > 4: wave_peaks.append((up_point, i)) return wave_peaks 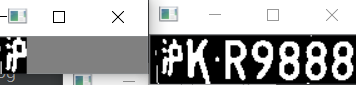
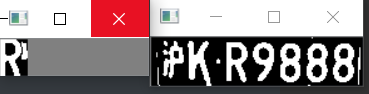
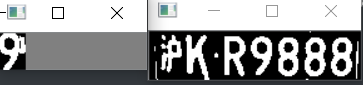
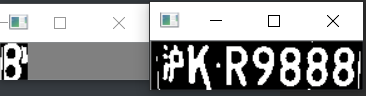
def seperate_card(img, waves): part_cards = [] for wave in waves: part_cards.append(img[:, wave[0]:wave[1]]) return part_cards def deskew(img): m = cv2.moments(img) if abs(m['mu02']) < 1e-2: return img.copy() skew = m['mu11']/m['mu02'] M = np.float32([[1, skew, -0.5*SZ*skew], [0, 1, 0]]) img = cv2.warpAffine(img, M, (SZ, SZ), flags=cv2.WARP_INVERSE_MAP | cv2.INTER_LINEAR) return img #车牌字符数应大于6 if len(wave_peaks) <= 6: print("peak less 1:", len(wave_peaks)) continue wave = max(wave_peaks, key=lambda x:x[1]-x[0]) max_wave_dis = wave[1] - wave[0] #判断是否是左侧车牌边缘 if wave_peaks[0][1] - wave_peaks[0][0] < max_wave_dis/3 and wave_peaks[0][0] == 0: wave_peaks.pop(0) #组合分离汉字 cur_dis = 0 for i,wave in enumerate(wave_peaks): if wave[1] - wave[0] + cur_dis > max_wave_dis * 0.6: break else: cur_dis += wave[1] - wave[0] if i > 0: wave = (wave_peaks[0][0], wave_peaks[i][1]) wave_peaks = wave_peaks[i+1:] wave_peaks.insert(0, wave) #去除车牌上的分隔点 point = wave_peaks[2] if point[1] - point[0] < max_wave_dis/3: point_img = gray_img[:,point[0]:point[1]] if np.mean(point_img) < 255/5: wave_peaks.pop(2) if len(wave_peaks) <= 6: print("peak less 2:", len(wave_peaks)) continue part_cards = seperate_card(gray_img, wave_peaks) for i, part_card in enumerate(part_cards): #可能是固定车牌的铆钉 if np.mean(part_card) < 255/5: print("a point") continue part_card_old = part_card w = abs(part_card.shape[1] - SZ)//2 part_card = cv2.copyMakeBorder(part_card, 0, 0, w, w, cv2.BORDER_CONSTANT, value = [0,0,0]) part_card = cv2.resize(part_card, (SZ, SZ), interpolation=cv2.INTER_AREA) #part_card = deskew(part_card) part_card = preprocess_hog([part_card]) if i == 0: resp = self.modelchinese.predict(part_card) charactor = provinces[int(resp[0]) - PROVINCE_START] else: resp = self.model.predict(part_card) charactor = chr(resp[0]) #判断最后一个数是否是车牌边缘,假设车牌边缘被认为是1 if charactor == "1" and i == len(part_cards)-1: if part_card_old.shape[0]/part_card_old.shape[1] >= 7:#1太细,认为是边缘 continue predict_result.append(charactor) roi = card_img card_color = color break return predict_result, roi, card_color
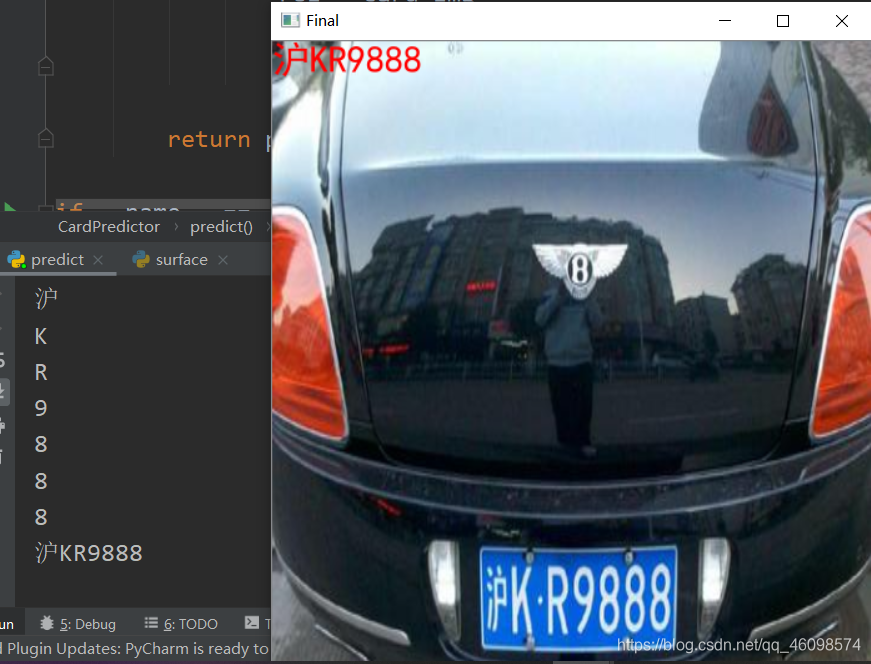
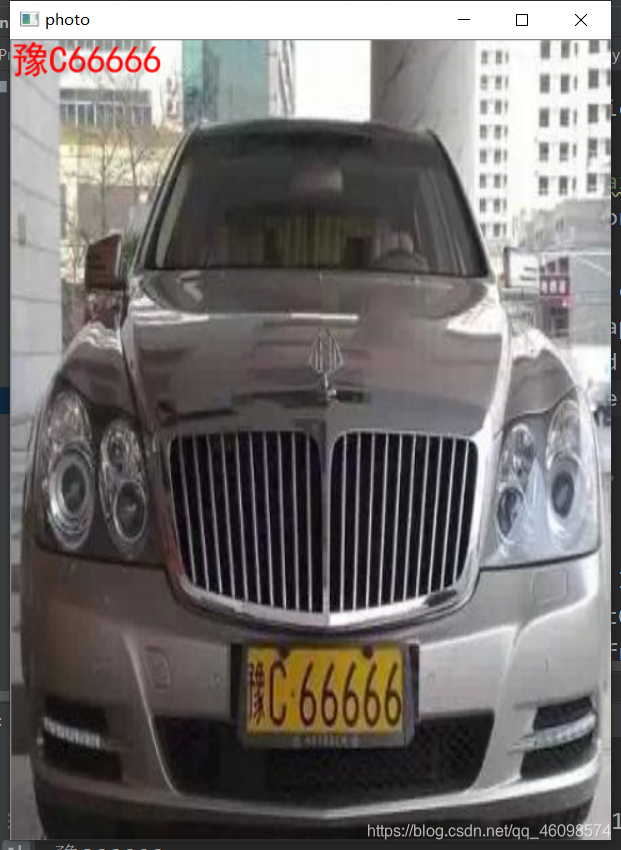
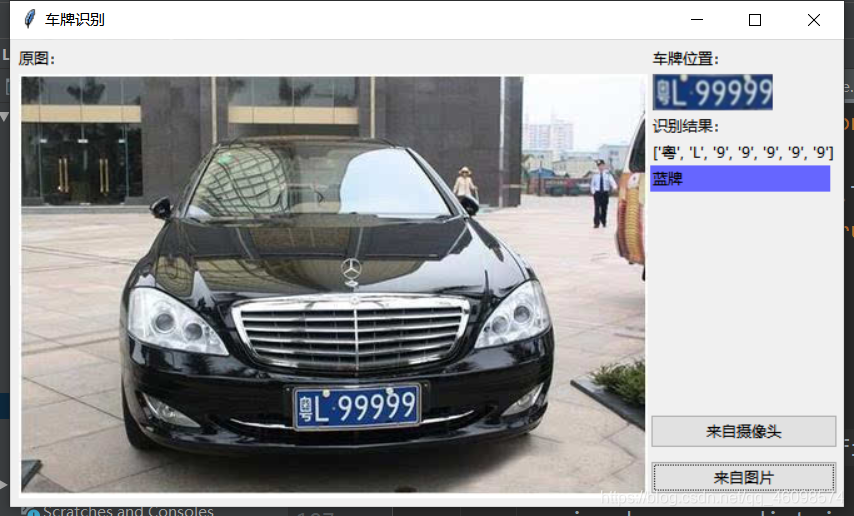
if __name__ == '__main__': c = CardPredictor() c.train_svm() r, roi, color = c.predict("test//car7.jpg") print(r, roi.shape[0],roi.shape[1],roi.shape[2]) img = cv2.imread("test//car7.jpg") img = cv2.resize(img,(480,640),interpolation=cv2.INTER_LINEAR) r = ','.join(r) r = r.replace(',', '') print(r) from PIL import Image, ImageDraw, ImageFont cv2img = cv2.cvtColor(img, cv2.COLOR_BGR2RGB) # cv2和PIL中颜色的hex码的储存顺序不同 pilimg = Image.fromarray(cv2img) # PIL图片上打印汉字 draw = ImageDraw.Draw(pilimg) # 图片上打印 font = ImageFont.truetype("simhei.ttf", 30, encoding="utf-8") # 参数1:字体文件路径,参数2:字体大小 draw.text((0, 0), r, (255, 0, 0), font=font) # 参数1:打印坐标,参数2:文本,参数3:字体颜色,参数4:字体 # PIL图片转cv2 图片 cv2charimg = cv2.cvtColor(np.array(pilimg), cv2.COLOR_RGB2BGR) # cv2.imshow("图片", cv2charimg) # 汉字窗口标题显示乱码 cv2.imshow("photo", cv2charimg) cv2.waitKey(0) cv2.destroyAllWindows() OPENCV的SVM的SVC训练模型
OpenCv进行图像采集/控制摄像头
图像预处理(二值化操作,边缘计算等)
定位车牌位置,并正放置处理——>确定车牌颜色
根据车牌颜色再定位,缩小边缘非车牌边界
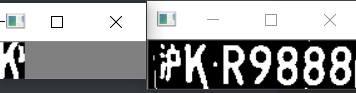
以下为识别车牌中的字符
返回结果
最后ptrdict返回识别到的字符、定位的车牌图像、车牌颜色
结果显示,并使用PIL方法显示中文
打字不易,看到最后,别忘记了关注一下~,另外欢迎大家进入我的机器&深度学习,大佬云集,大家一起进步!
 上海第二工业大学 18智能A1 周小夏(CV调包侠)
本网页所有视频内容由 imoviebox边看边下-网页视频下载, iurlBox网页地址收藏管理器 下载并得到。
ImovieBox网页视频下载器 下载地址: ImovieBox网页视频下载器-最新版本下载
本文章由: imapbox邮箱云存储,邮箱网盘,ImageBox 图片批量下载器,网页图片批量下载专家,网页图片批量下载器,获取到文章图片,imoviebox网页视频批量下载器,下载视频内容,为您提供.
阅读和此文章类似的: 全球云计算
 官方软件产品操作指南 (170)


