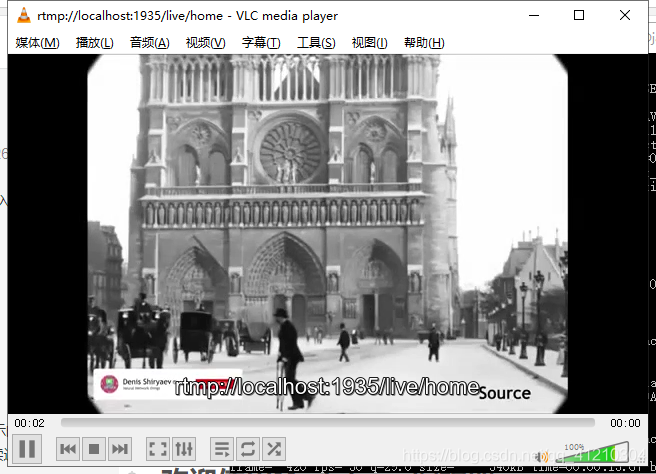
nginx.exe -c confnginx-win-rtmp.conf ffmpeg -re -i mp4路径/mp4文件名.mp4 -vcodec libx264 -acodec aac -f flv rtmp://localhost:1935/live/home rtmp://localhost:1935/live/home
Win10 Python+Nginx+FFmpeg+Django2.2 搭建RTMP流媒体服务器并实现摄像头rtmp推流并且在网页上显示
前言:最近在做一个人工智能项目,让我从摄像头读取视频流,然后经过神经网络的处理,从而将处理后的视频流推到HTML上显示。这里就整个实现过程做一个总结。本人是技术能力有限,如有错误之处,请谅解。
第一步:实验之前需要准备的东西有
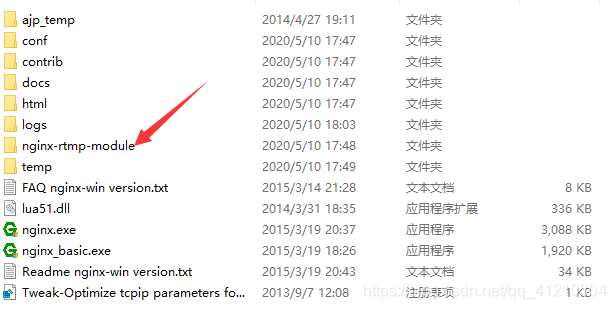
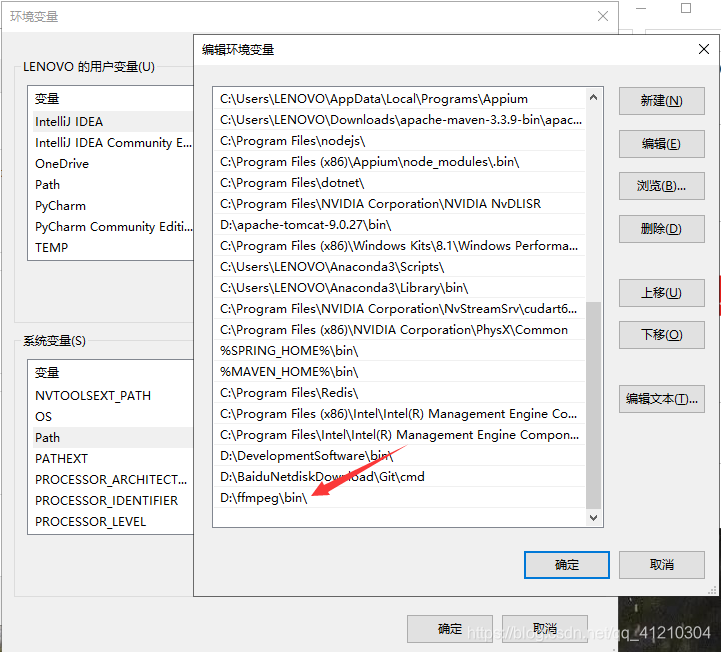
第二步 安装,配置
#user nobody; #multiple workers works ! worker_processes 2; #error_log logs/error.log; #error_log logs/error.log notice; #error_log logs/error.log info; #pid logs/nginx.pid; events { worker_connections 8192; #max value 32768, nginx recycling connections+registry optimization = #this.value * 20 = max concurrent connections currently tested with one worker #C1000K should be possible depending there is enough ram/cpu power #multi_accept on; } rtmp { server { listen 1935; chunk_size 4000; application live { live on; # record first 1K of stream record all; record_path /tmp/av; record_max_size 1K; # append current timestamp to each flv record_unique on; # publish only from localhost allow publish 127.0.0.1; deny publish all; #allow play all; } } } http { #include /nginx/conf/naxsi_core.rules; include mime.types; default_type application/octet-stream; #log_format main '$remote_addr:$remote_port - $remote_user [$time_local] "$request" ' # '$status $body_bytes_sent "$http_referer" ' # '"$http_user_agent" "$http_x_forwarded_for"'; #access_log logs/access.log main; # # loadbalancing PHP # upstream myLoadBalancer { # server 127.0.0.1:9001 weight=1 fail_timeout=5; # server 127.0.0.1:9002 weight=1 fail_timeout=5; # server 127.0.0.1:9003 weight=1 fail_timeout=5; # server 127.0.0.1:9004 weight=1 fail_timeout=5; # server 127.0.0.1:9005 weight=1 fail_timeout=5; # server 127.0.0.1:9006 weight=1 fail_timeout=5; # server 127.0.0.1:9007 weight=1 fail_timeout=5; # server 127.0.0.1:9008 weight=1 fail_timeout=5; # server 127.0.0.1:9009 weight=1 fail_timeout=5; # server 127.0.0.1:9010 weight=1 fail_timeout=5; # least_conn; # } sendfile off; #tcp_nopush on; server_names_hash_bucket_size 128; ## Start: Timeouts ## client_body_timeout 10; client_header_timeout 10; keepalive_timeout 30; send_timeout 10; keepalive_requests 10; ## End: Timeouts ## #gzip on; server { listen 80; server_name localhost; location /stat { rtmp_stat all; rtmp_stat_stylesheet stat.xsl; } location /stat.xsl { root nginx-rtmp-module/; } location /control { rtmp_control all; } #charset koi8-r; #access_log logs/host.access.log main; ## Caching Static Files, put before first location #location ~* .(jpg|jpeg|png|gif|ico|css|js)$ { # expires 14d; # add_header Vary Accept-Encoding; #} # For Naxsi remove the single # line for learn mode, or the ## lines for full WAF mode location / { #include /nginx/conf/mysite.rules; # see also http block naxsi include line ##SecRulesEnabled; ##DeniedUrl "/RequestDenied"; ##CheckRule "$SQL >= 8" BLOCK; ##CheckRule "$RFI >= 8" BLOCK; ##CheckRule "$TRAVERSAL >= 4" BLOCK; ##CheckRule "$XSS >= 8" BLOCK; root html; index index.html index.htm; } # For Naxsi remove the ## lines for full WAF mode, redirect location block used by naxsi ##location /RequestDenied { ## return 412; ##} ## Lua examples ! # location /robots.txt { # rewrite_by_lua ' # if ngx.var.http_host ~= "localhost" then # return ngx.exec("/robots_disallow.txt"); # end # '; # } #error_page 404 /404.html; # redirect server error pages to the static page /50x.html # error_page 500 502 503 504 /50x.html; location = /50x.html { root html; } # proxy the PHP scripts to Apache listening on 127.0.0.1:80 # #location ~ .php$ { # proxy_pass https://127.0.0.1; #} # pass the PHP scripts to FastCGI server listening on 127.0.0.1:9000 # #location ~ .php$ { # root html; # fastcgi_pass 127.0.0.1:9000; # single backend process # fastcgi_pass myLoadBalancer; # or multiple, see example above # fastcgi_index index.php; # fastcgi_param SCRIPT_FILENAME $document_root$fastcgi_script_name; # include fastcgi_params; #} # deny access to .htaccess files, if Apache's document root # concurs with nginx's one # #location ~ /.ht { # deny all; #} } # another virtual host using mix of IP-, name-, and port-based configuration # #server { # listen 8000; # listen somename:8080; # server_name somename alias another.alias; # location / { # root html; # index index.html index.htm; # } #} # HTTPS server # #server { # listen 443 ssl spdy; # server_name localhost; # ssl on; # ssl_certificate cert.pem; # ssl_certificate_key cert.key; # ssl_session_timeout 5m; # ssl_prefer_server_ciphers On; # ssl_protocols TLSv1 TLSv1.1 TLSv1.2; # ssl_ciphers ECDH+AESGCM:ECDH+AES256:ECDH+AES128:ECDH+3DES:RSA+AESGCM:RSA+AES:RSA+3DES:!aNULL:!eNULL:!MD5:!DSS:!EXP:!ADH:!LOW:!MEDIUM; # location / { # root html; # index index.html index.htm; # } #} }
第三步 ffmpeg rtmp推流实验
第四步 进行HTML上摄像头rtmp推流播放
<!DOCTYPE html> <html> <head> <meta charset=“ UTF-8 ” > <title >使用video.js实现rtmp流的直播播放 </title > {% load static %} <!--引入播放器样式--> <link href ="https://vjs.zencdn.net/5.19/video-js.min.css" rel="stylesheet"> <! - 引入播放器js - > <script src ="https://vjs.zencdn.net/5.19/video.min.js"></script > <script src ="https://cdn.jsdelivr.net/npm/videojs-flash@2/dist/videojs-flash.min.js"></script > </head > <body> <!--vjs-big-play-centered 播放按钮居中--> <!--poster默认的显示界面,就是还没点播放,给你显示的界面--> <!--controls 规定浏览器应该为视频提供播放控件--> <!--preload="auto" 是否提前加载--> <!--autoplay 自动播放--> <!--loop=true 自动循环--> <!--data-setup='{"example_option":true}' 可以把一些属性写到这个里面来,如data-setup={"autoplay":true}--> <video id="my-player" class="video-js vjs-default-skin vjs-big-play-centered" controls preload="auto" autoplay="autoplay" poster="//vjs.zencdn.net/v/oceans.png" width="500" height="400" data-setup='{}'> <!--src: 规定媒体文件的 URL type:规定媒体资源的类型--> <source src='rtmp://localhost:1935/live/home' type='rtmp/flv'/> </video> <script type="text/javascript"> // 设置flash路径,用于在videojs发现浏览器不支持HTML5播放器的时候自动唤起flash播放器 videojs.options.flash.swf = 'https://cdn.bootcss.com/videojs-swf/5.4.1/video-js.swf'; var player = videojs('my-player'); //my-player为页面video元素的id player.play(); //播放 // 1. 播放 player.play() // 2. 停止 player.pause() // 3. 暂停 player.pause() </script> </body> </html>
import queue import threading import cv2 as cv import subprocess as sp class Live(object): def __init__(self): self.frame_queue = queue.Queue() self.command = "" # 自行设置 self.rtmpUrl = "rtmp://localhost:1935/live/home" self.camera_path =0 def read_frame(self): print("开启推流") cap = cv.VideoCapture(0) print('asda') # Get video information fps = int(cap.get(cv.CAP_PROP_FPS)) width = int(cap.get(cv.CAP_PROP_FRAME_WIDTH)) height = int(cap.get(cv.CAP_PROP_FRAME_HEIGHT)) # ffmpeg command self.command = ['ffmpeg', '-y', '-f', 'rawvideo', '-vcodec', 'rawvideo', '-pix_fmt', 'bgr24', '-s', "{}x{}".format(width, height), '-r', str(fps), '-i', '-', '-c:v', 'libx264', '-pix_fmt', 'yuv420p', '-preset', 'ultrafast', '-f', 'flv', self.rtmpUrl] # read webcamera while (cap.isOpened()): ret, frame = cap.read() if not ret: print("Opening camera is failed") # 说实话这里的break应该替换为: # cap = cv.VideoCapture(self.camera_path) # 因为我这俩天遇到的项目里出现断流的毛病 # 特别是拉取rtmp流的时候!!!! break # put frame into queue self.frame_queue.put(frame) def push_frame(self): # 防止多线程时 command 未被设置 while True: if len(self.command) > 0: # 管道配置 p = sp.Popen(self.command, stdin=sp.PIPE) break while True: if self.frame_queue.empty() != True: frame = self.frame_queue.get() # process frame # 你处理图片的代码 # write to pipe p.stdin.write(frame.tostring()) def run(self): threads = [ threading.Thread(target=Live.read_frame, args=(self,)), threading.Thread(target=Live.push_frame, args=(self,)) ] [thread.setDaemon(True) for thread in threads] [thread.start() for thread in threads]
def play_video(request): #推流 live=Live() live.run() return render(request,'polls/video.html',{'error_message':"ii"})

结语:搞技术就要多做多总结,加油!!!如有错误,请指出.
本网页所有视频内容由 imoviebox边看边下-网页视频下载, iurlBox网页地址收藏管理器 下载并得到。
ImovieBox网页视频下载器 下载地址: ImovieBox网页视频下载器-最新版本下载
本文章由: imapbox邮箱云存储,邮箱网盘,ImageBox 图片批量下载器,网页图片批量下载专家,网页图片批量下载器,获取到文章图片,imoviebox网页视频批量下载器,下载视频内容,为您提供.
阅读和此文章类似的: 全球云计算
 官方软件产品操作指南 (170)


