本文主要讲解如何进行智能合约的编译,部署以及打包,首先,读者需要会编写智能合约,了解solidity语言以及以太币。 我这里环境是Mac系统,linux系统命令也是类似。 1.安装geth客户端以及操作 默认安装目录: 在安装成功之后进入其bin目录,编写json文件,进行geth客户端的初始化工作,下面是genesis.json文件: 下面命令进行初始化操作: 如果要进入geth命令行。可以执行下面的命令: 启动一个私链: 启动geth客户端: 2.编译智能合约 首先安装solc编译工具(这里需要有node环境): 进行编译(-o参数输出路径,自己创建即可): 当你编译成功的时候,在输出路径下会有分别以 .bin、.abi结尾的文件。 3.安装web3j CLI,打包部署合约 安装web3j CLI: 如果上面命令安装不了,可在github上进行下载:https://github.com/web3j/web3j/releases 在安装web3j之后,进入其bin目录,打包上面编译好的合约: 4.使用web3j进行合约的调用,转账 web3j是一个高度模块化、响应式、类型安全的Java和Android库,用于与智能合约交互,并与Ethereum网络的客户端(节点)集成。 新建一个maven项目,导入下面的依赖: 然后将上面打包好合约生成的Java文件拷贝到项目中。下面是合约产生的Java文件示例: 编写代码进行调用: 至此我们就完成了智能合约的编译、打包,以及进行调用,进行转账等操作。
brew tap ethereum/ethereum brew install ethereum /usr/local/Cellar/ethereum/版本{ "config": { "chainId": 666, "homesteadBlock": 0, "eip150Block": 0, "eip150Hash": "0x0000000000000000000000000000000000000000000000000000000000000000", "eip155Block": 0, "eip158Block": 0, "byzantiumBlock": 0, "constantinopleBlock": 0, "petersburgBlock": 0, "istanbulBlock": 0, "ethash": {} }, "nonce": "0x0", "timestamp": "0x5ddf8f3e", "extraData": "0x0000000000000000000000000000000000000000000000000000000000000000", "gasLimit": "0x47b760", "difficulty": "0x00002", "mixHash": "0x0000000000000000000000000000000000000000000000000000000000000000", "coinbase": "0x0000000000000000000000000000000000000000", "alloc": { "0x1e82968C4624880FD1E8e818421841E6DB8D1Fa4" : {"balance" : "30000000000000000000"} }, "number": "0x0", "gasUsed": "0x0", "parentHash": "0x0000000000000000000000000000000000000000000000000000000000000000" } geth --datadir "/usr/local/Cellar/ethereum/1.9.13/bin/chain" init genesis.json geth attach /usr/local/Cellar/ethereum/1.9.13/bin/chain/geth.ipc geth --identity "PICCetherum" --rpc --rpccorsdomain "*" --datadir "/usr/local/Cellar/ethereum/1.9.13/bin/chain" --port 8545 --networkid 666 geth --rpcapi="web3,eth,net,db,personal" --rpc --rinkeby npm install -g solc solcjs /Users/ljq/.atom/solidityDemo/Person.sol --bin --abi --optimize -o ./ether_files curl -L https://get.web3j.io | sh ./web3j solidity generate /path/to/<smart-contract>.bin /path/to/<smart-contract>.abi -o /path/to/src/main/java -p com.your.organisation.name 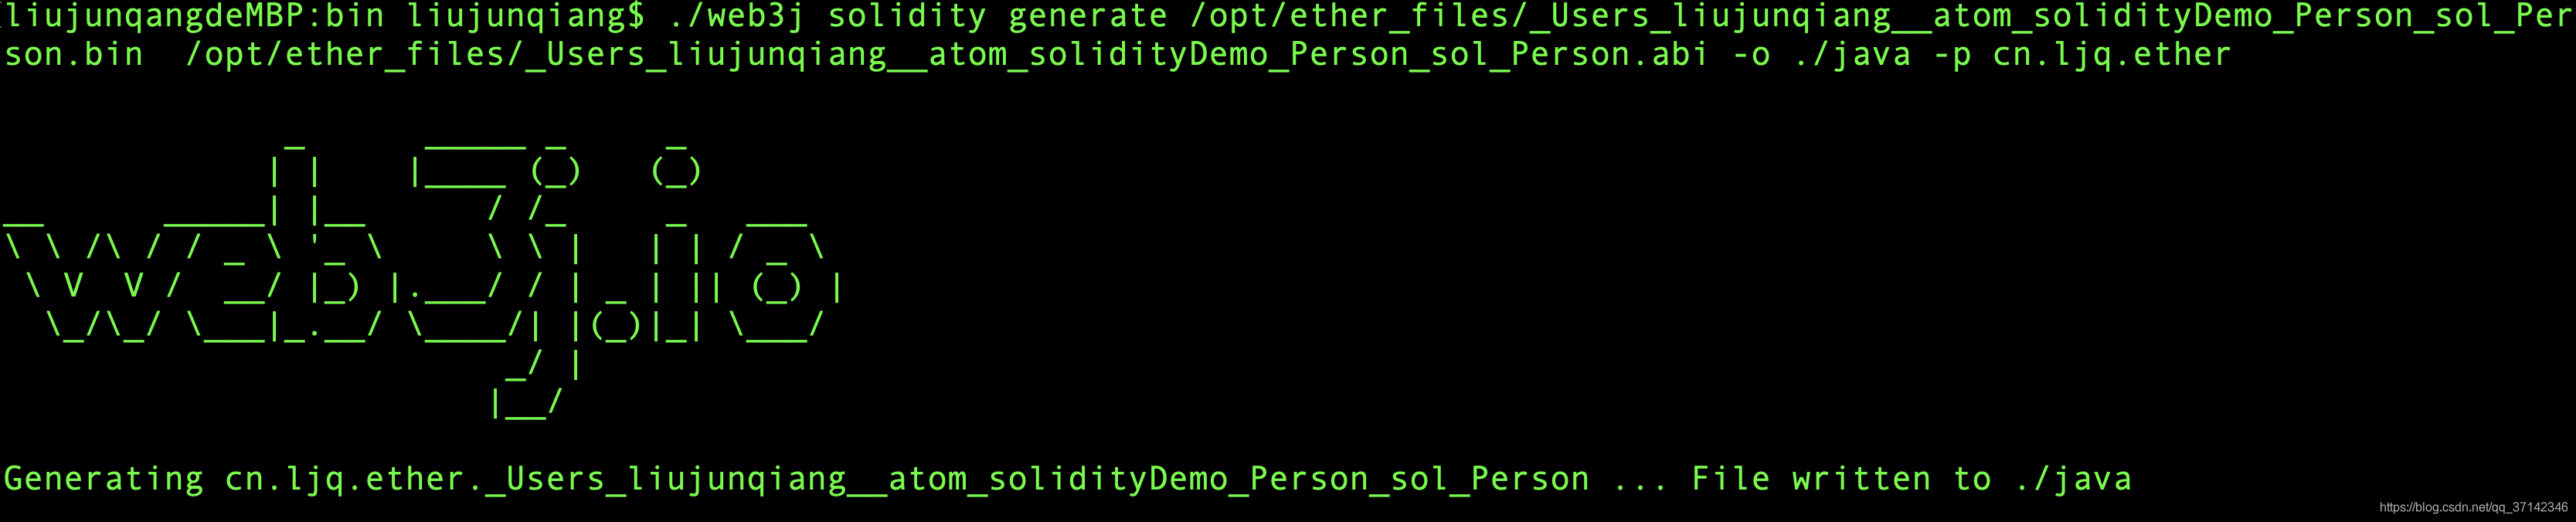
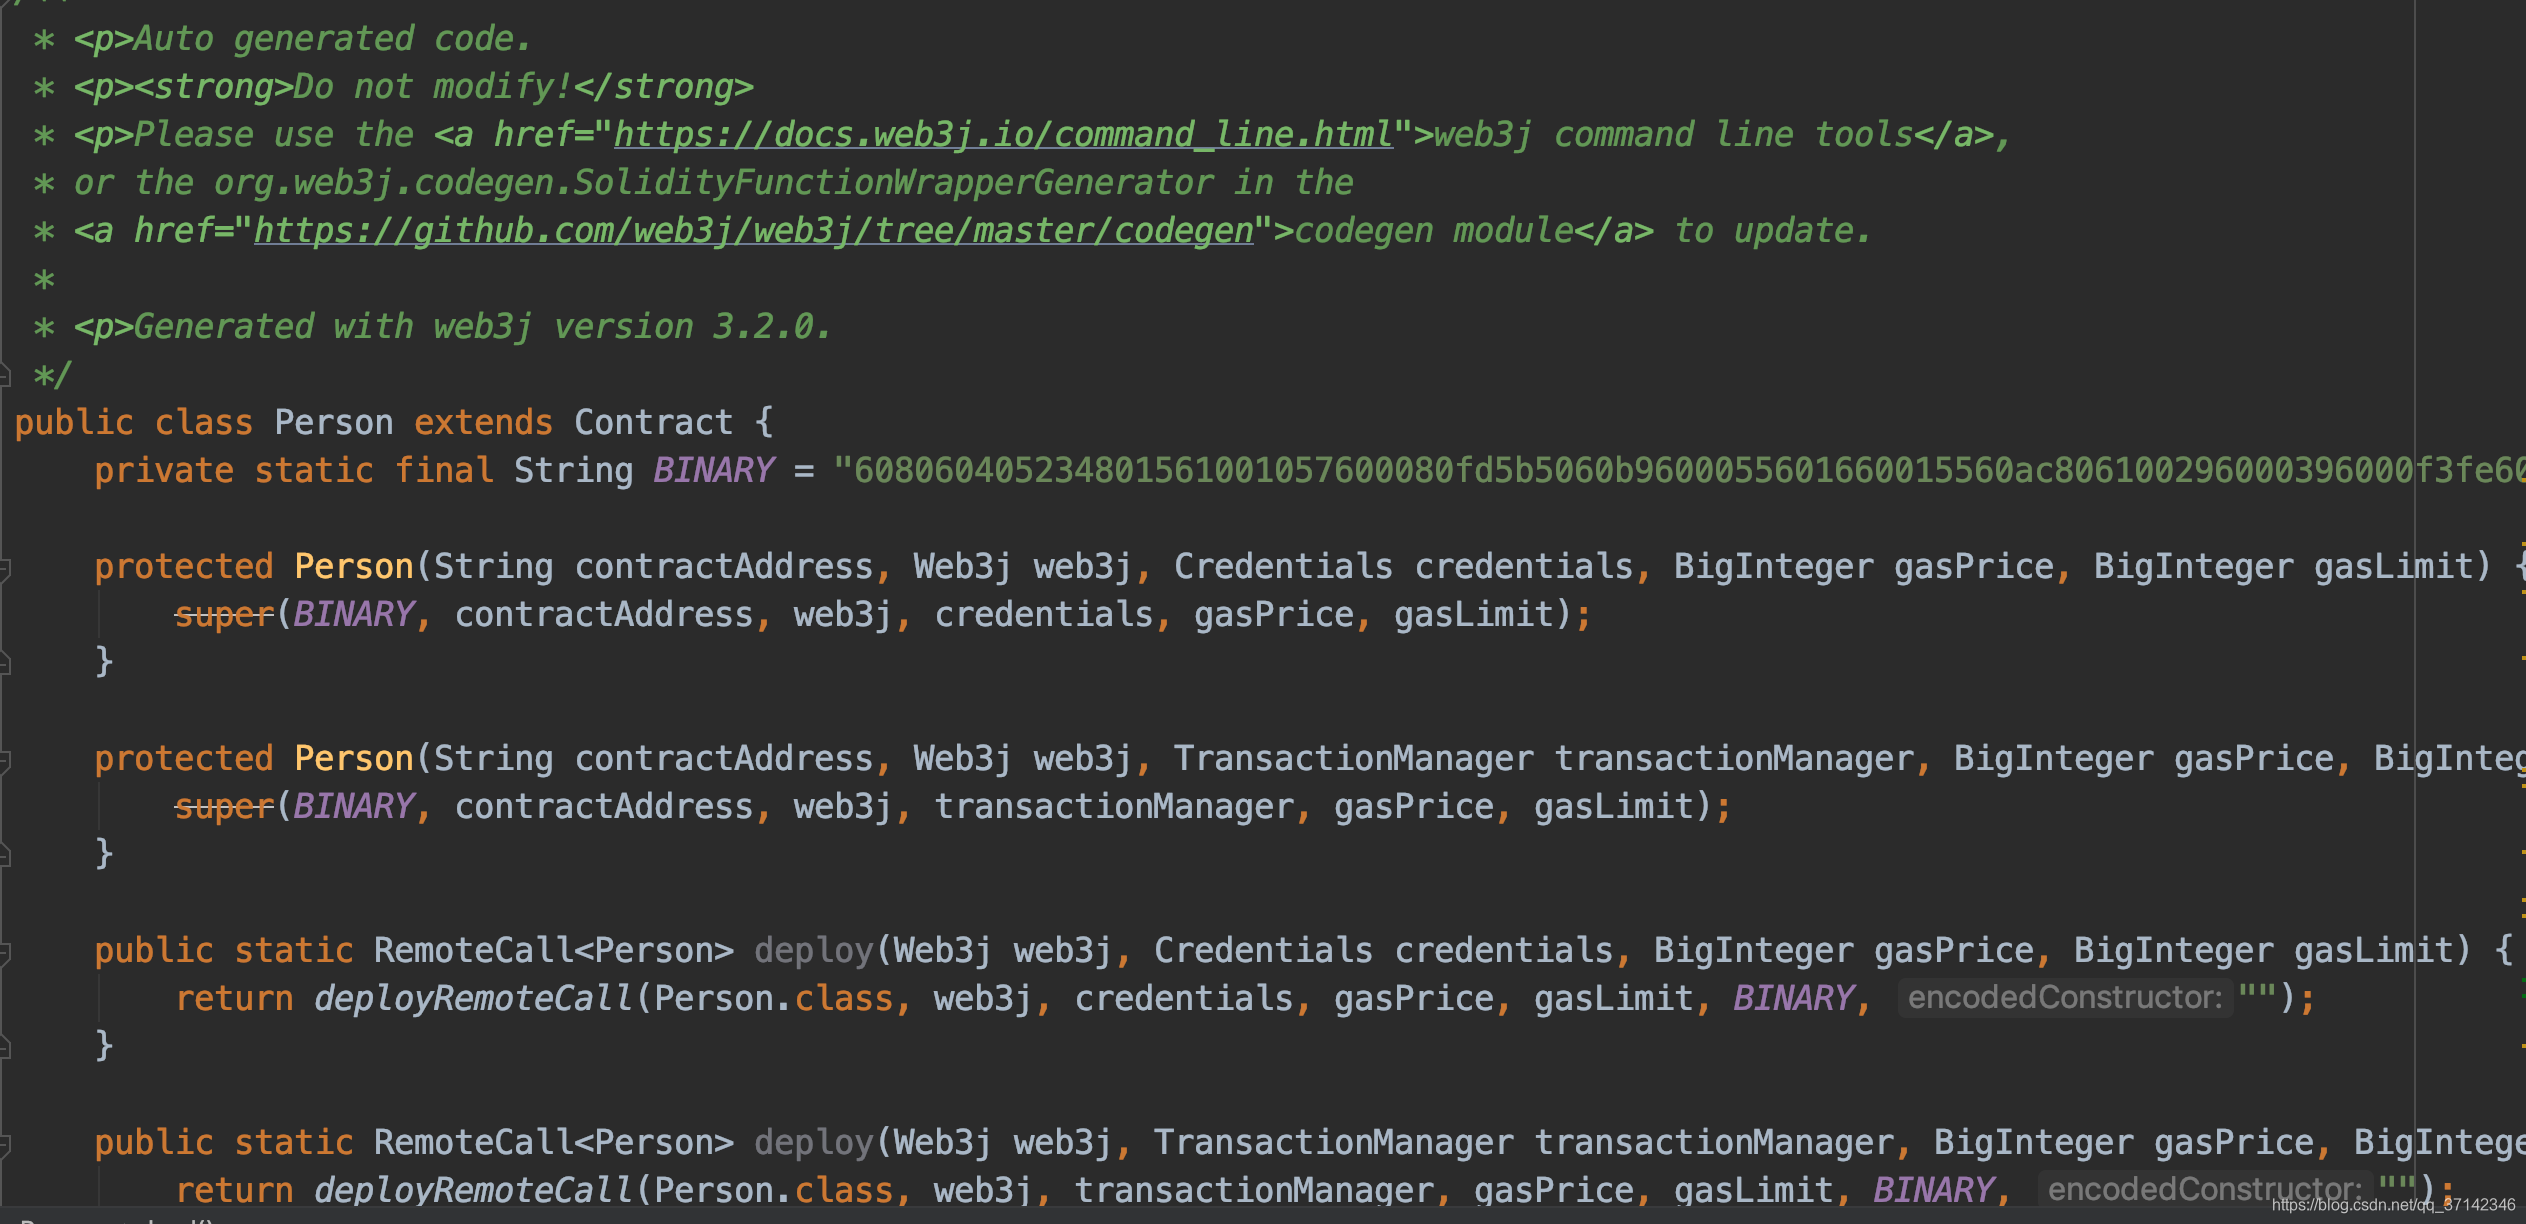
从上图中我们可以看到在 java 这个文件夹中生成了一个Java文件,这样我们可以在项目中调用,进行转账等一系列操作。<dependency> <groupId>org.web3j</groupId> <artifactId>core</artifactId> <version>3.4.0</version> </dependency>
package cn.ljq.web3j; import com.sun.deploy.Environment; import com.sun.tools.javac.util.Context; import org.web3j.crypto.CipherException; import org.web3j.crypto.Credentials; import org.web3j.crypto.WalletUtils; import org.web3j.protocol.Web3j; import org.web3j.protocol.core.methods.response.TransactionReceipt; import org.web3j.protocol.http.HttpService; import org.web3j.tx.Transfer; import org.web3j.utils.Convert; import sun.awt.SunHints; import sun.java2d.pipe.AlphaPaintPipe; import java.awt.*; import java.io.File; import java.io.IOException; import java.math.BigDecimal; import java.math.BigInteger; /** * * */ public class App { public static void main( String[] args ) { try { //发送同步请求 Web3j web3 = Web3j.build(new HttpService()); // defaults to https://localhost:8545/ String filePath = "/opt/ether_files/credential_files"; //第一个参数是账户密码 String fileName = WalletUtils.generateNewWalletFile("123456789",new File(filePath),false); //第一个参数是账户密码 Credentials credentials = WalletUtils.loadCredentials("123456789", filePath+"/"+fileName); Person contract1 = Person.load("0xd21F7F01B7dB0FA465E2431CbCD15Cff69254339",web3, credentials, BigInteger.valueOf(27000000000L), BigInteger.valueOf(250000)); //打印合约地址 System.out.println(contract1.getContractAddress()); //使用以太钱包文件发送以太币给其他人 TransactionReceipt receipt = Transfer.sendFunds(web3,credentials, "0xf760913C374dA7850DB6D0083bd1fC5325153cee", BigDecimal.valueOf(0.1), Convert.Unit.ETHER).send(); }catch (Exception e){ e.printStackTrace(); } } }
本网页所有视频内容由 imoviebox边看边下-网页视频下载, iurlBox网页地址收藏管理器 下载并得到。
ImovieBox网页视频下载器 下载地址: ImovieBox网页视频下载器-最新版本下载
本文章由: imapbox邮箱云存储,邮箱网盘,ImageBox 图片批量下载器,网页图片批量下载专家,网页图片批量下载器,获取到文章图片,imoviebox网页视频批量下载器,下载视频内容,为您提供.
阅读和此文章类似的: 全球云计算
 官方软件产品操作指南 (170)

 博客专家
博客专家 


 7万+
7万+